
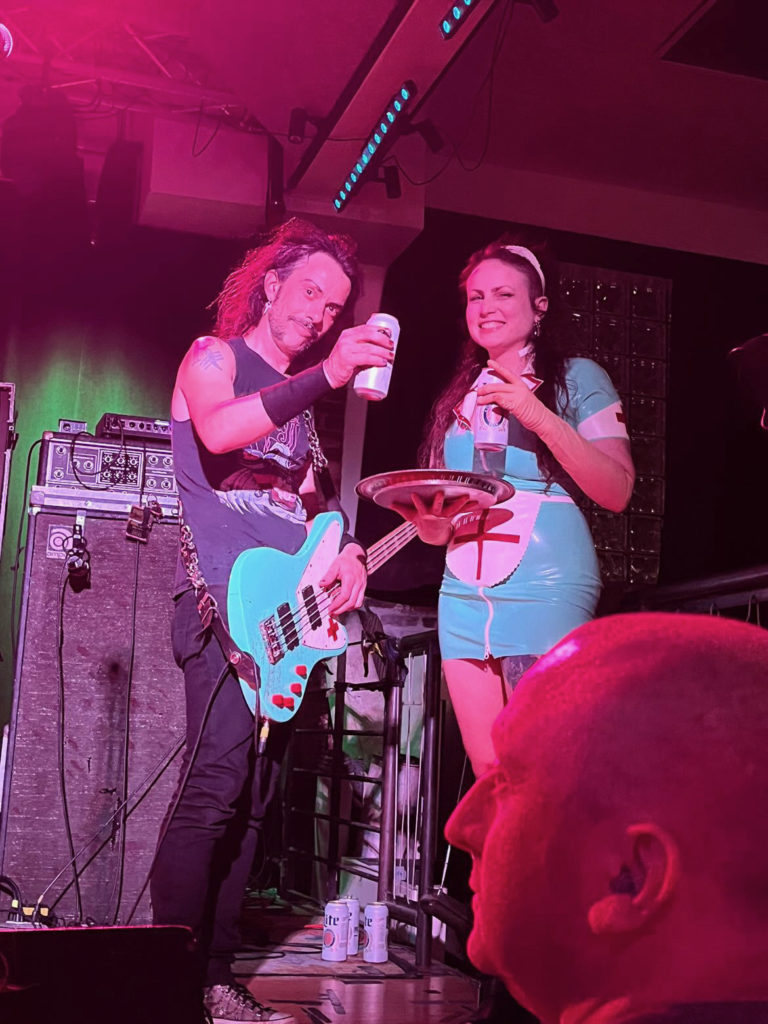
Kind of an odd post for this blog, but music often includes theater and theater includes costumes. On the last Exhumed tour in 2022, I was fortunate enough to have my lovely girlfriend accompany us for three shows. At the last minute, our guitarist Baz remembered a photo shoot I had done with her featuring my teal “sexy nurse” GB-4 bass and my girlfriend in a sexy latex nurse costume she had from before we met. It just HAPPENED to be the exact same colors. I call it kismet. Anyway, he suggested we invite her on stage with us to perform with us and our own inimitable Dr. Philthy! It was a grand idea and she assented.
Latex clothing is a tricky beast. It needs to be tight but this can also make it difficult to put on. It doesn’t slide on like normal cotton, it’s got tack to it when applied to skin. While getting ready before our show in Philadelphia at Johnny Brenda’s, we moved a little too fast and undid some of the seams on the collar of the dress. The seams are glued, not sewn (obviously) and we were lucky we didn’t actually rip the latex. Also of some luck, our direct support had red duct tape that matched the collar’s piping so I was able to make a quick fix for the night and the show went on. This dress wasn’t cheap, though, so we needed to do a REAL fix. So, I learned how to fix latex clothing.
The process itself is not hard, it just requires some finesse with a paint brush. It is very similar to what I’d already done with foam building in my other band of more theatrical cannibal graveyard dwellers. The essential crux is this; you put glue on two things, let that glue dry a bit, then cement the pieces together. I found this tutorial by a helpful fella in a gimp mask very instructive: https://www.youtube.com/watch?v=Sdte4OsOIuM
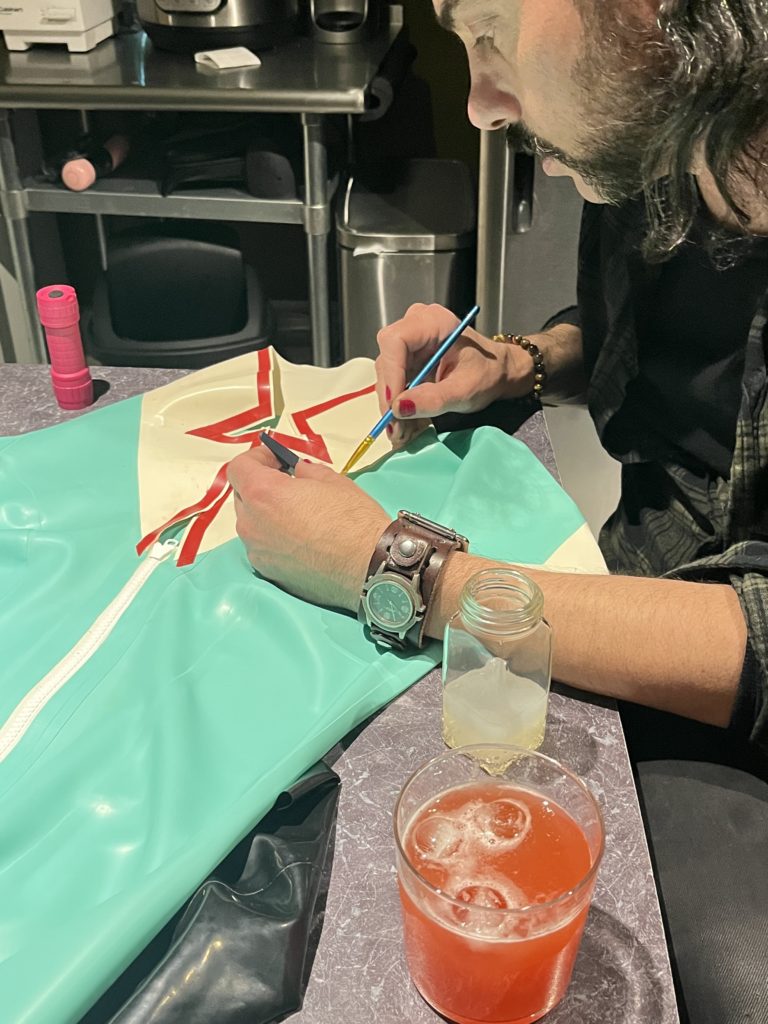
For latex fixing or building, you need Best-Test Paper Cement and Bestine Solvent and Thinner. These are mixed in a ratio of 7:3 (or 70 cement / 30 solvent if that helps your math). This makes the rubber cement run smoother and more brush ready and helps with drying time.
Clean old glue off the latex with mineral spirits (also important to do when gluing new latex). Once dry, carefully brush the solution on both sides you want to glue together; you don’t want overrun of the glue past the seams. The latex will curl a bit, so you have to make sure the pieces stay separated. I did this using packing tape to better hold the pieces in place and stretched out. After about five minutes, cement the two pieces together and use a seam roller or some other flat rolling thing to really press down on the seam.
Voila! Your latex is glued together and your sexy latex nurse is ready for another night of menacing people with fake rubber limbs.