
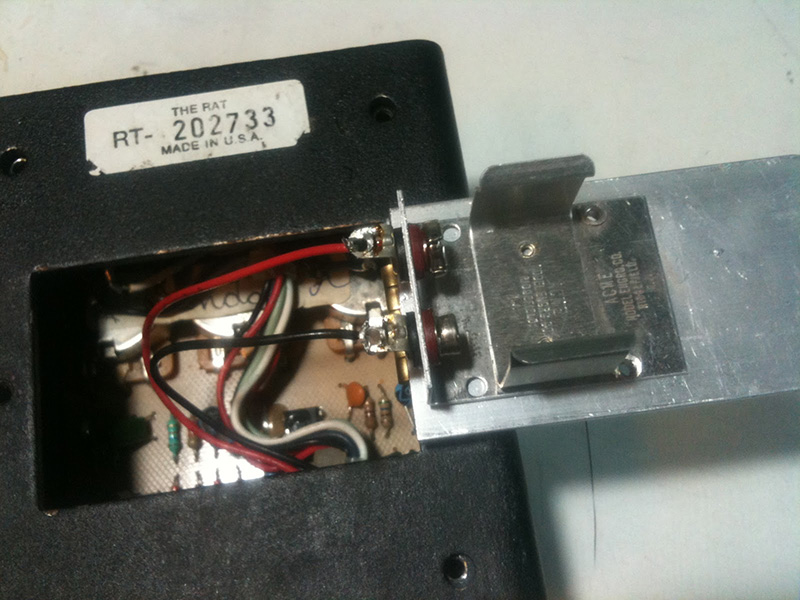
The ProCo Rat is a legendary pedal. It was designed by ProCo engineer Scott Burnham in 1978 in an attempt to build a better mouse trap, so to speak, compared to the pedals they were modding for customers. With some finesse, it can be dialed in as a fuzz, distortion or overdrive. It has a relatively simple distortion circuit built around a single LM308 opamp, itself now a coveted IC chip. It’s the tone on Metallica’s “Kill ’em All.” Legend has it two in a row were used for Carcass’s “Reek of Putrefaction.” Kurt Cobain, Thurston Moore, Kevin Shields, and Jeff Beck are all listed users (info from the always infallible Wikipedia). With the Rat2 in 1988, ProCo innovated again by adding what’s known as the Rat bypass, allowing true-bypass with a power indicating LED.

So what’s with the fucking battery cover? It sucks. Any time I see these pedals, the battery cover is long gone and the bottom is covered in icky duct tape leaving gummy residue all over the black box. The first one I got, a Rat2, was the same. Liberal amounts of Goo Gone were applied to clean the bastard. My friend gave me an original ’84 Rat. Again, no battery cover. All my friends with Rats? Duct taped battery covers.
I know musicians are idiots. Apparently, the folks at ProCo thought better of us all. FAIL. Apparently, screwing in a simple battery cover door is an impossible task to NOT fuck up. I went about trying to rectify this situation. First, I tried writing to ProCo about replacements. I got no response. Apparently they haven’t innovated on customer service.
My first attempts were without ever having seen an actual intact battery door for a Rat. With mixed results, I cut up some scrap metal I bought at Urban Ore, the local salvage store. I fitted them to the Rat. The replacement screw is a #6-32 coarse metal screw. I chose to get a socket cap screw so it could be undone by hand, as I understood the originals to be. Never mind the hot rod red cases… that was all me and a seasoning of OCD.
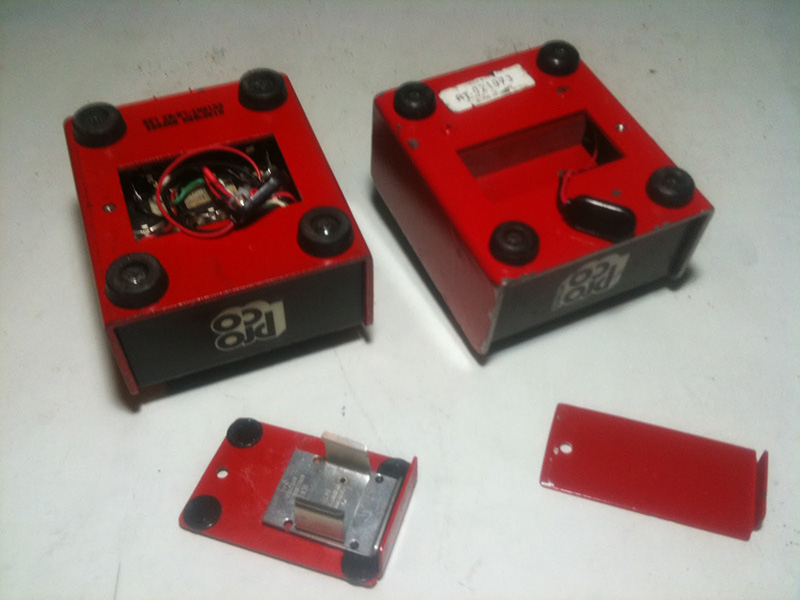
These worked well enough. Then I picked up a used, and of course battery door free, Rat2 up in PDX for Mauz from Kicker. He’d wanted one for awhile. I decided I could do him one better before I gave it to him. I set about making foolproof battery door for the Rat, one that would never get lost.
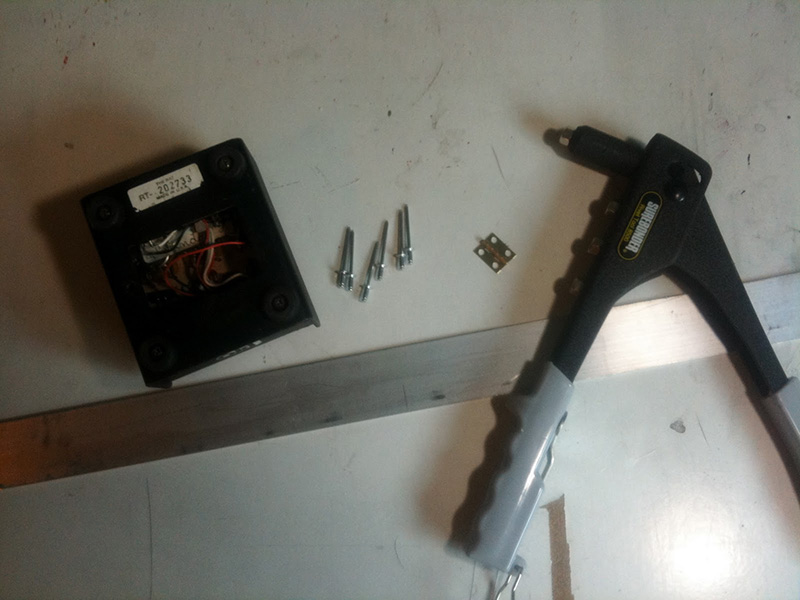
1. Materials… pop rivet tool, four 1/8×1/8″ pop rivets, two 1/8×1/4″ pop rivets, a 3/4×5/8″ brass hinge, a strip of 1 1/2×1/16″ thin aluminum (or wider)… all from True Value hardware. Not included are the tools one should already have: drill, bits, Dremel tool, one battery door missing Rat2.
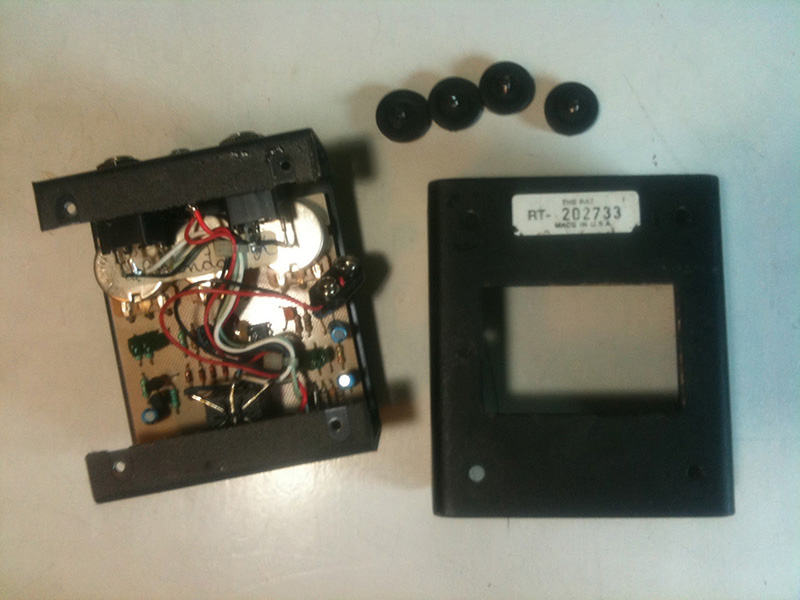
2. Take the feet off the pedal. This part seems obvious, but here ya go. Don’t be a dummy. Get just the bottom of the Rat2 to work with.

3. Measure where to cut the aluminum strip first, with room for the screw that fastens the door to the pedal. I got 2 3/4″ length.
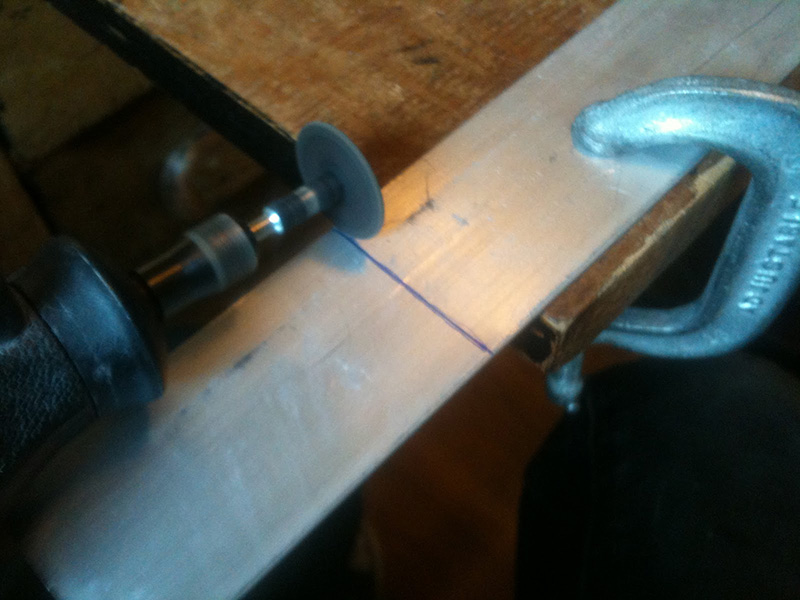
4. Cut the aluminum with a Dremel tool. It’s the best… if you want to tool around and DIY shit, a Dremel or it’s generic equivalent is absolutely essential. Just be sure to wear safety glasses. If you’re reading this, you are a musician, and therefore, a dummy.
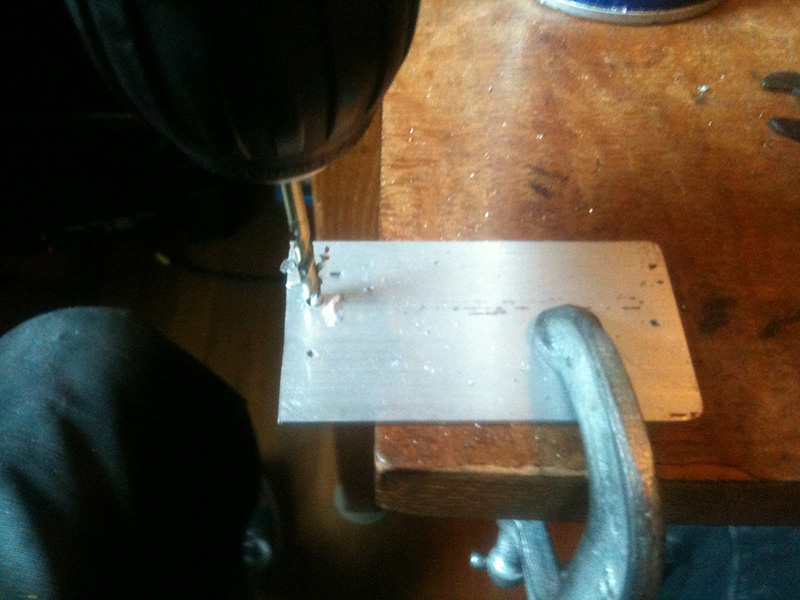
5. Drill 1/8″ holes into the future battery door for the hinge and the fastening screw. The screw hole actually needs to be bigger than 1/8″. Do this by getting a slightly larger drill bit, or like me… run the drill around the hole like an angry caveman until it’s big enough for the screw. Lots of WD40 oil to lubricate drilling, or your bits will dull. Round the corners with sandpaper; sharp edges suck for dumb musicians.
6. Slip in pop rivets. For the battery door, you’ll use the 1/8×1/8″ pop rivets. The former number refers to the diameter of the rivet. The latter number refers to the amount of “grab” the rivet has, or how much it can bind together.
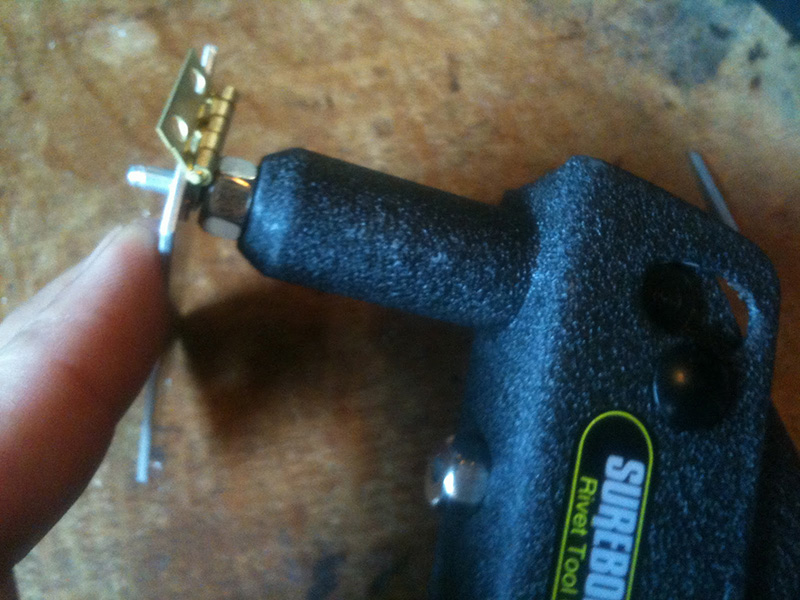
7. Rivet the fucker on. It’s easier than it looks. Just pump the tool (no sexual innuendo intended), then push it in again, and pump the tool again to eject the mandrel. Holy shit, this is getting me turned on.
8. The battery door is now riveted to the hinge. On the other side of things, I’ve cut the big end of the rivet off with the Dremel. That’s going to allow room for the battery holder. Just do it, it’s really hard to totally cut the rivet off. You won’t fail.
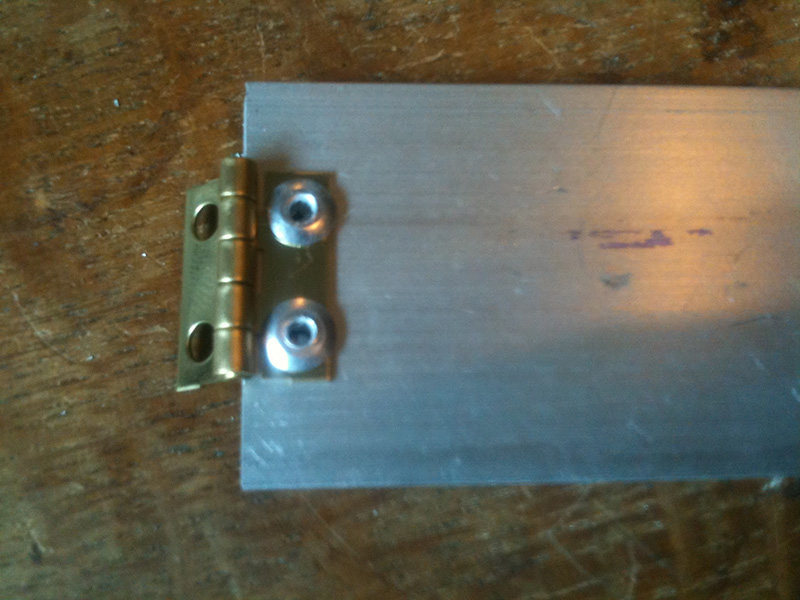
9. A 9V battery holder is riveted to the door. Expand a couple holes to 1/8″ and then cut the rivets, or the battery won’t slide in. Just look and copy what you see. It’s hard to explain… You can get a battery holder like this here from Fry’s Electronics.
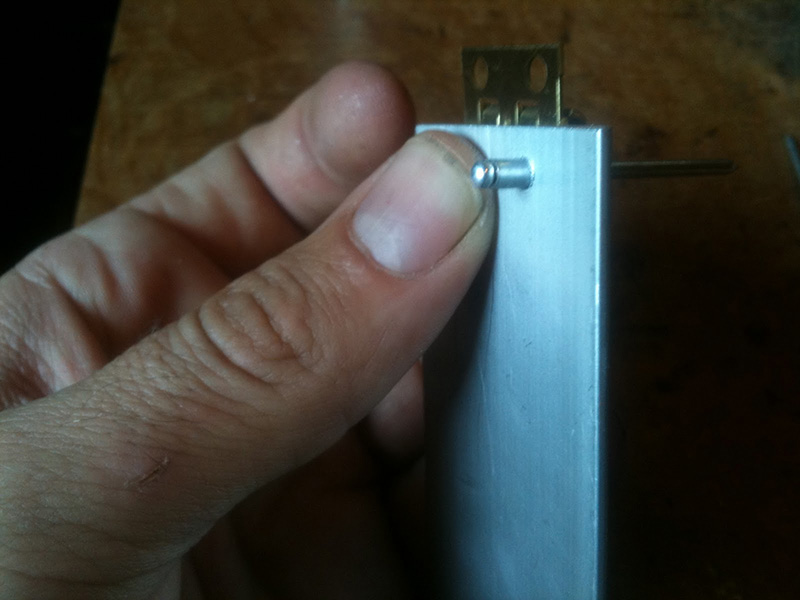
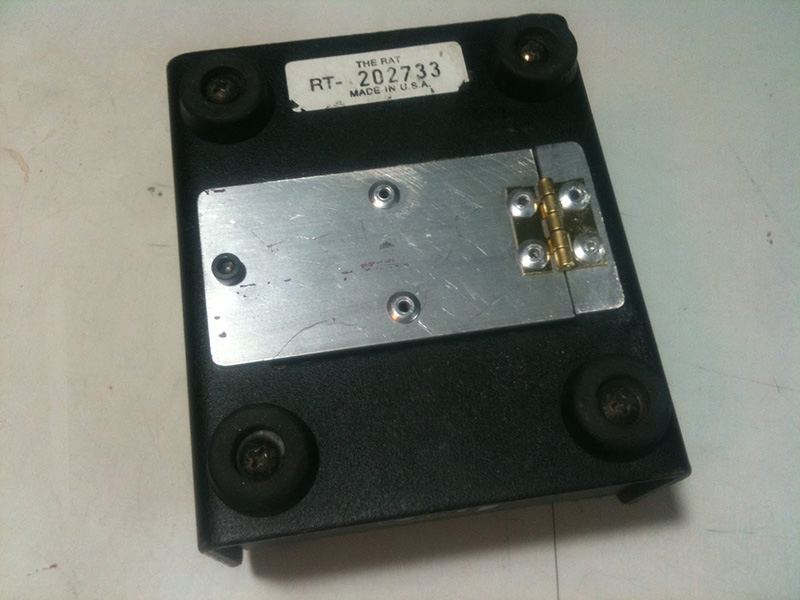
10. Cut what could be called a door frame to attach to the base of the pedal, itself. It’s 3/8″ long and cut from the same aluminum strip as the door. With accurate measuring, AKA drawing some dots, I drill and prepare where the holes will be in the pedal casing.
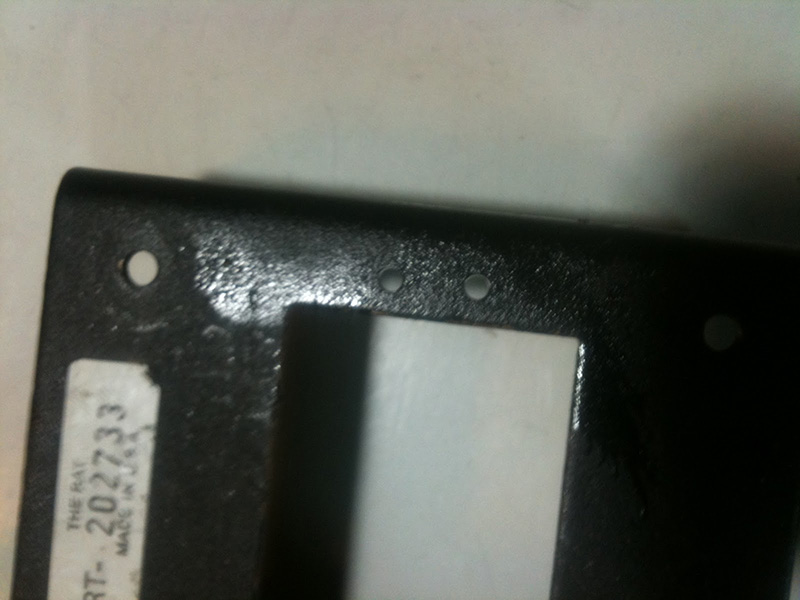
11. I’ve drilled into the case and made holes to attach the other side of the hinge.
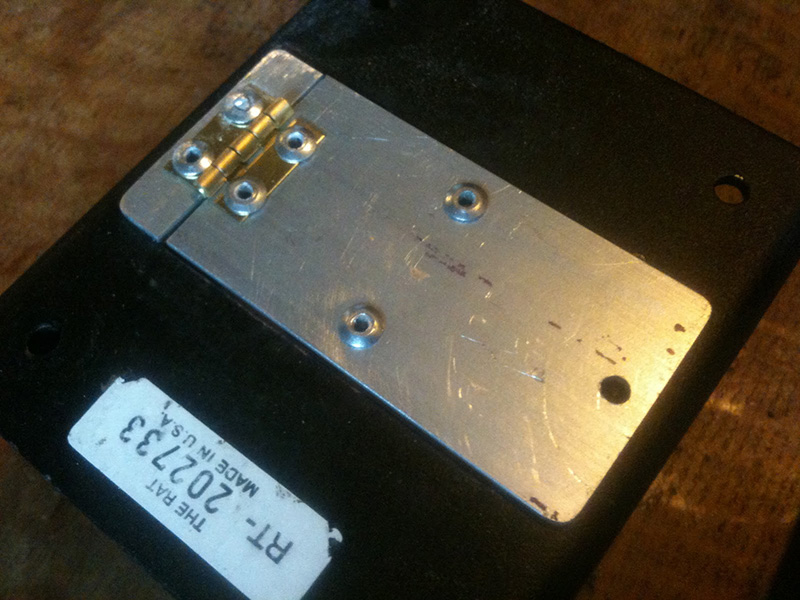
12. The battery door hinge, hinge frame, and case riveted together with 1/8×1/4″ pop rivet. Or nuts and bolts to allow a way to undo the bottom of the case and not unsolder the battery wire later for more modding. Here, I wanted to make a foolproof Rat2 for Mauz. A Rat for Mauz. I just got that.
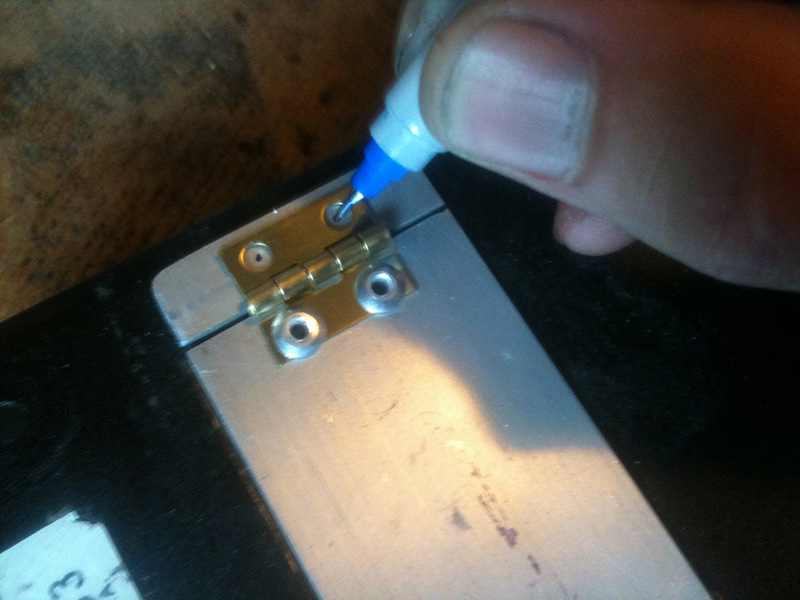
13. Cut the leads to the 9V battery clip and solder it to the 9V battery holder.
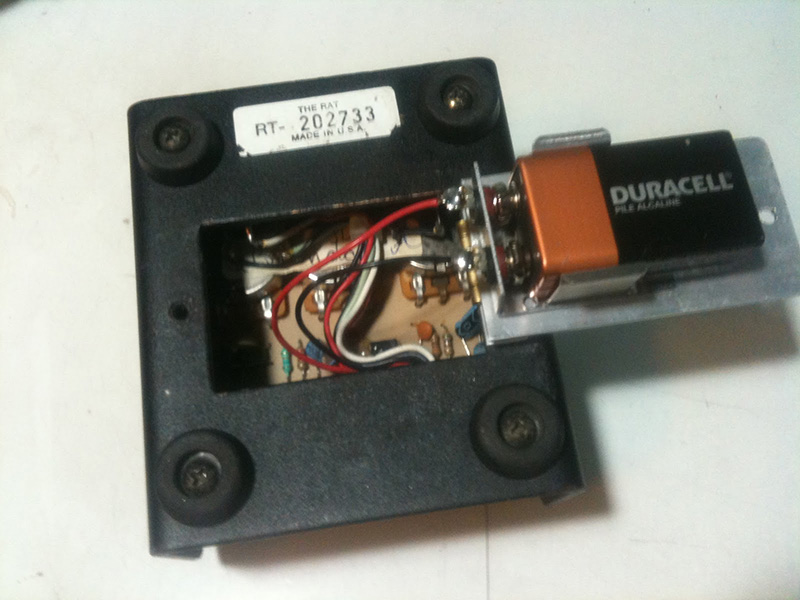
14. Add a battery to let the rockin’ commence.
15. Die tür ist geschlossen. For extra credit…
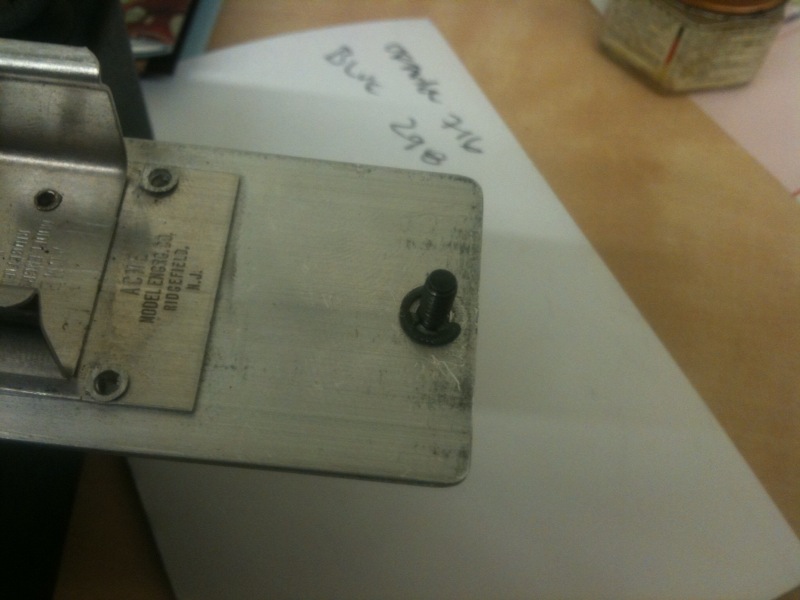
16. Smooth out the top 1/4″ of the #6-32 machine screw. This allows fastening a 9/64″ e-clip to make the screw permanently attached to the battery door. It took some finessing with the Dremel, sandpaper, and a Leatherman; don’t bother if you don’t think you’re up to it.
That’s it… my idiot proof, non-losable battery door for the excellent Rat or Rat2 distortion pedal. Some may scoff at the work involved, and that’s okay… it’s took me one whole hour and a half to do this, and that was with NO DIRECTIONS. Pussy. Should you want to try and replicate the lamer, easier, actual Rat battery door, though, I’m here for you. Stop your sobbing, my dear, your hero has arrived.
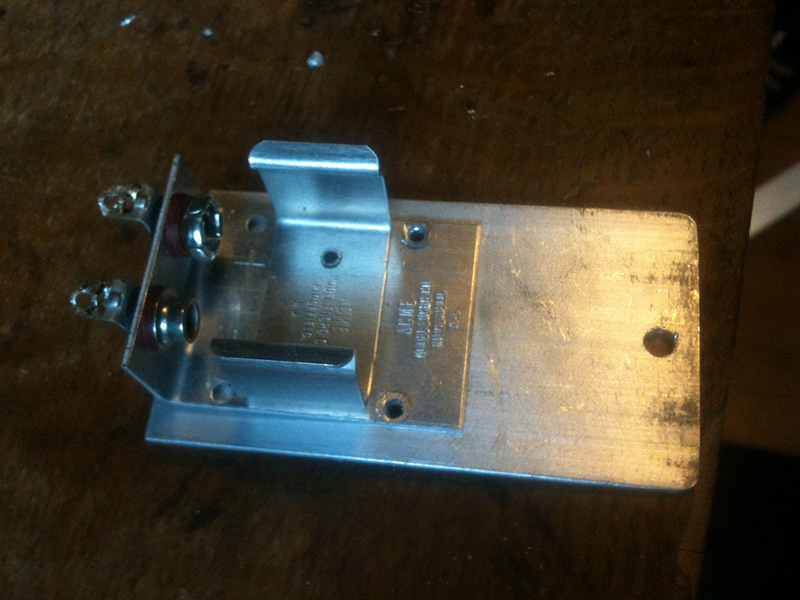
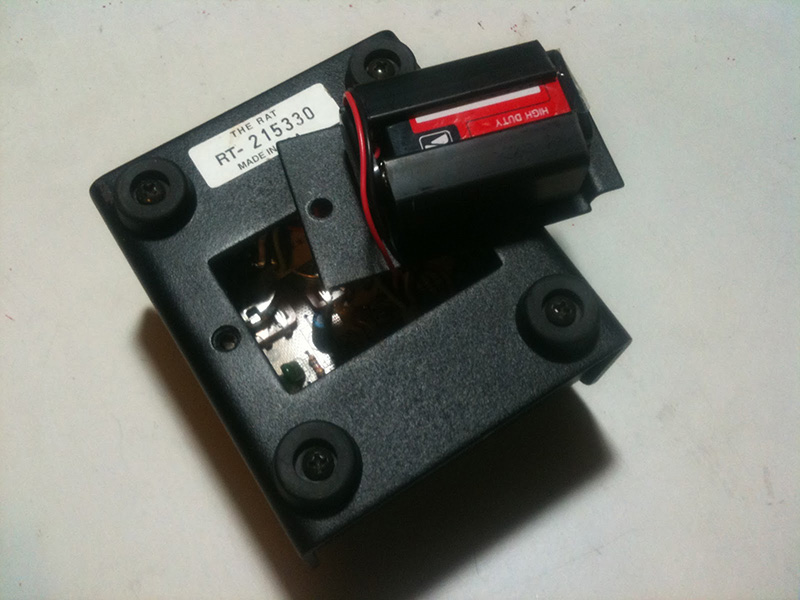
Here’s a photo of an actual Rat2 with the original battery door intact… a rare beast, indeed:
And here’s the battery door itself:
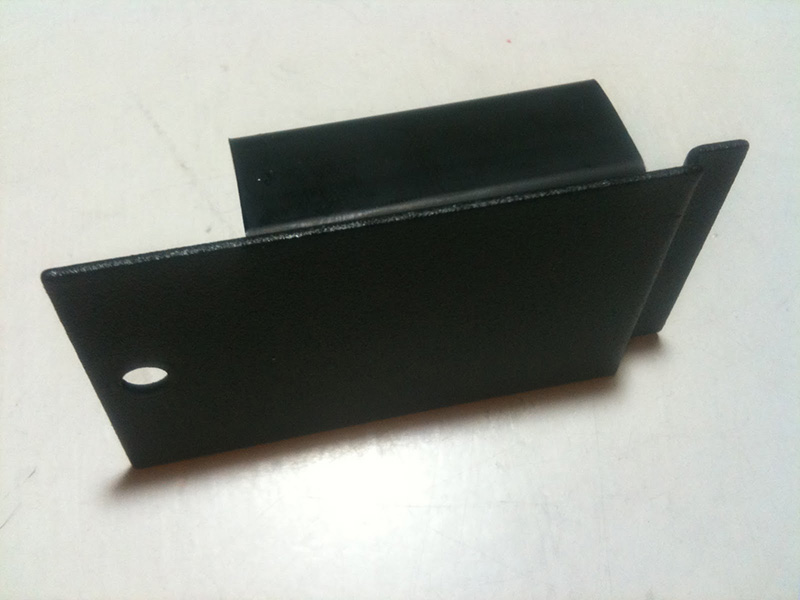
It’s just a well bent strip of metal. No big deal, but cheap to manufacture and it does the job… so long as it’s not lost. The battery clip, kind of like one of the ones here from Guitar Nucleus, is attached with nothing more complicated than double-sided sticky foam tape. No biggee… but but but… you’re not holding it! You don’t know how big it is! You’re exactly where I was when this started. No longer.
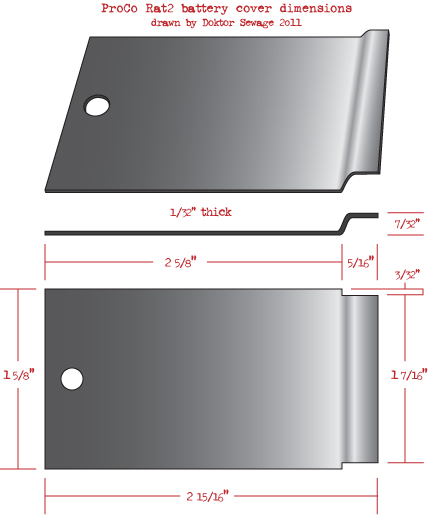
Should you fail using my excellent method for a bigger, better Rat battery compartment, than you can just copy the dimensions of the original which I’ve drawn out here:
For God’s sake, no more duct tape on those Rat pedals!
Super handy post and even a schematic. NICE.