
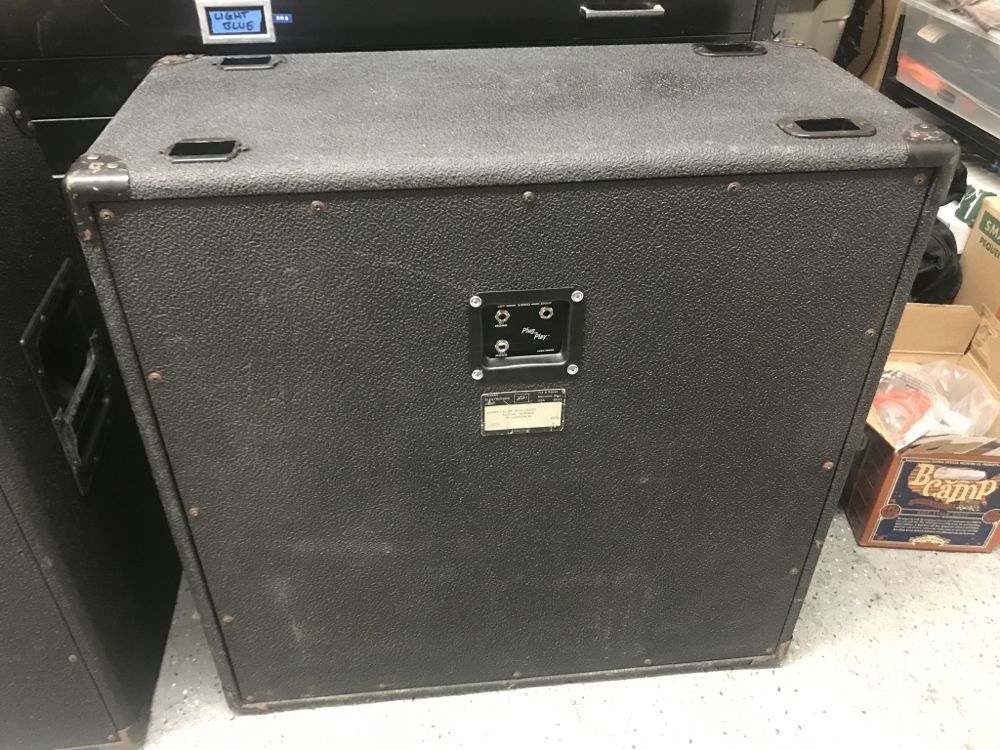
Maybe you have a guitar cab with just a single input, but you want to be able to switch to 4Ω instead of just the 16Ω it’s wired to. Maybe you want to run your speakers in stereo. Maybe you just hate those stupid fucking bullshit plastic Marshall switchable stereo jack plates that constantly break. If any of this applies to you, please consider the Plug and Play jack plate as a replacement.
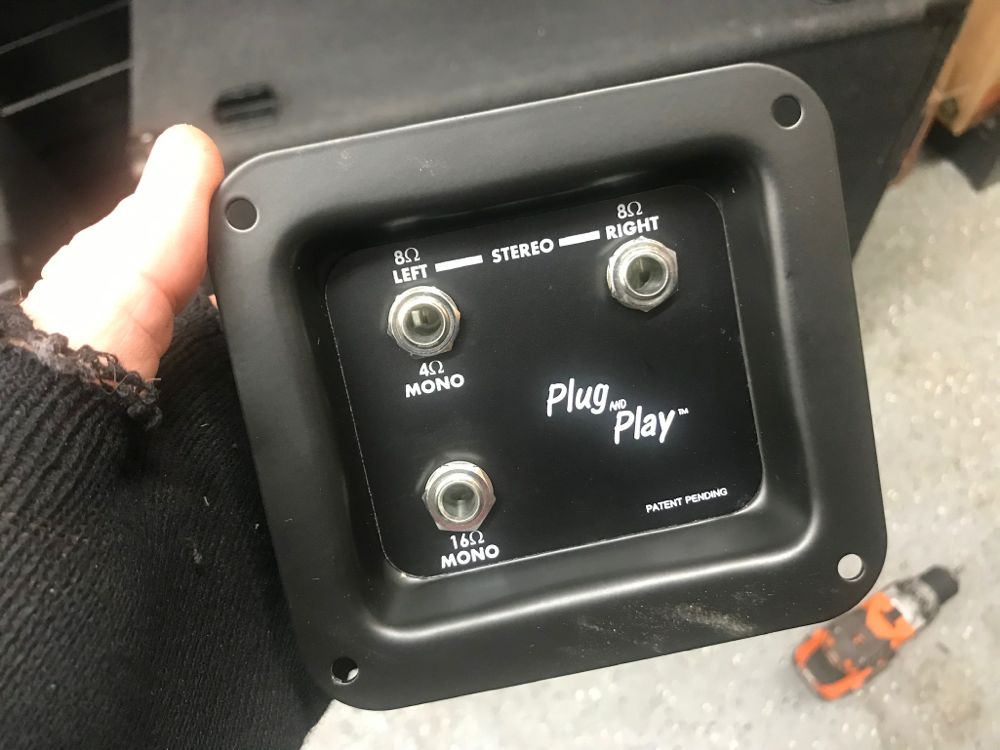
Full disclosure: I have nothing to disclose. This was bought and I installed it. As far as I can tell, it’s made by Amplified Parts, a webstore I use frequently to purchase tubes and parts. This is an all purpose jack plate made of durable metal with no stupid switches that break. Installing one is easy.
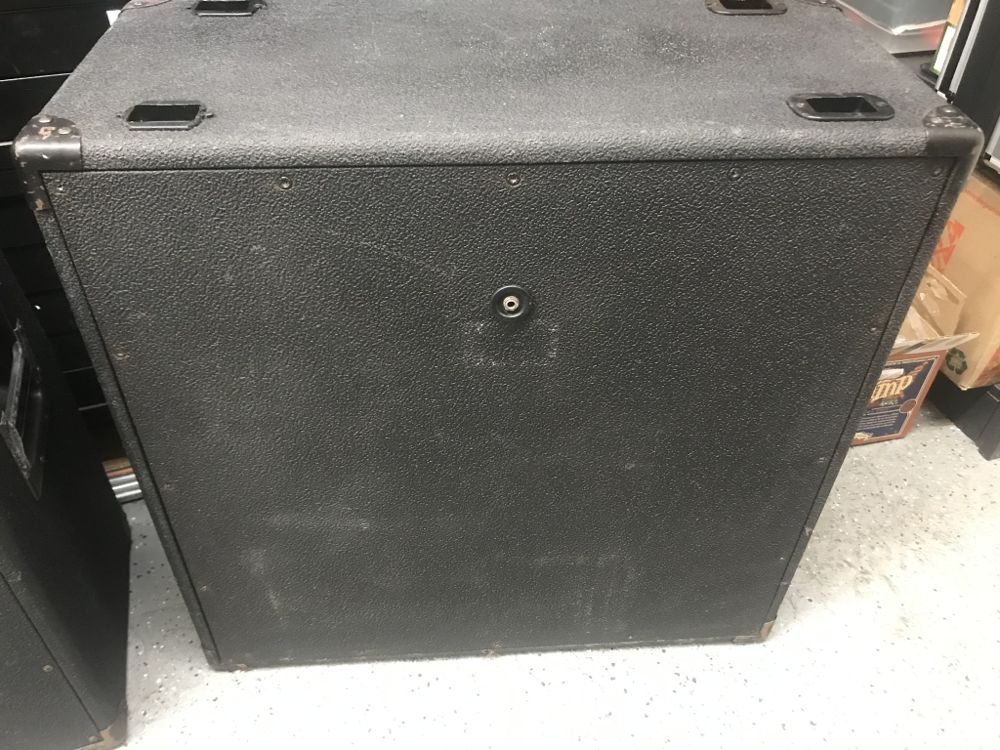
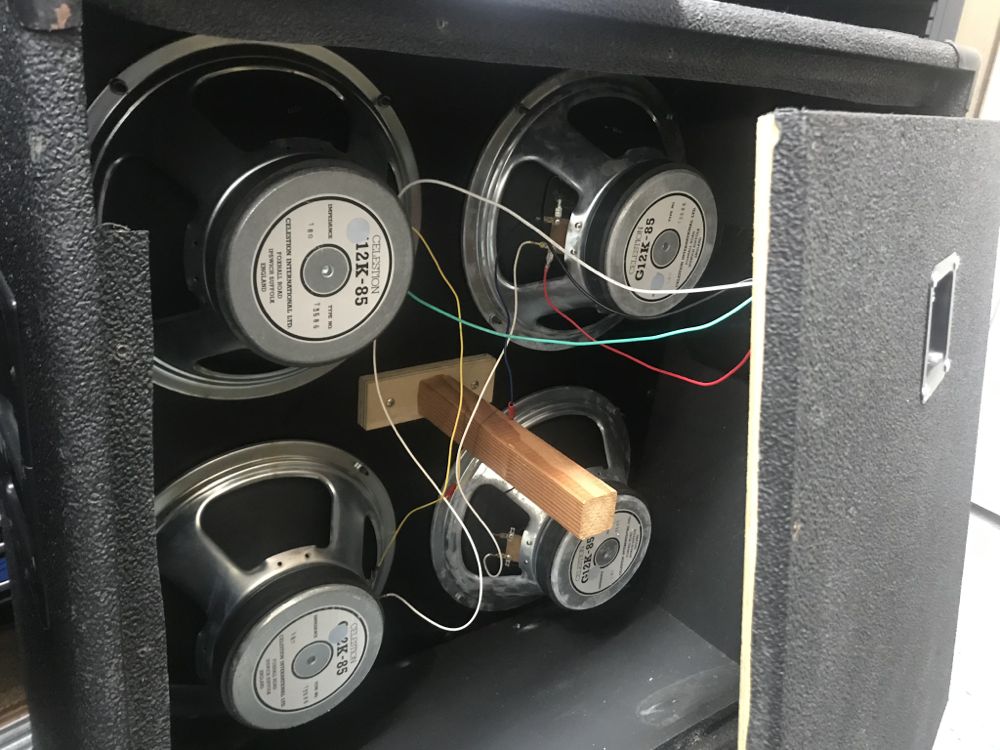
My boss and friend wanted to be able to switch from 16Ω to 4Ω easily. He has an old Peavey cabinet that was wired to 16Ω only.
I told him to get the Plug and Play and he did. Then he made me install it. Bosses, yeah? Anyway, the documentation for installation is easily accessible on the product page for the Plug and Play and ready to be printed out. [EDIT: pdf available here as well s-h700_dimensions]
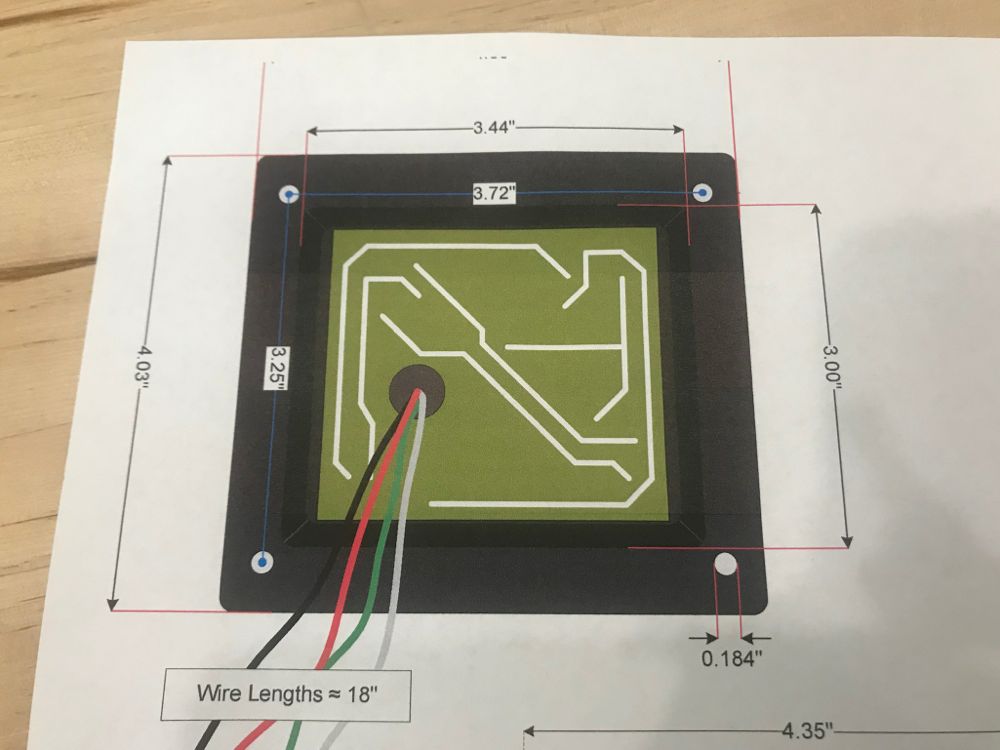
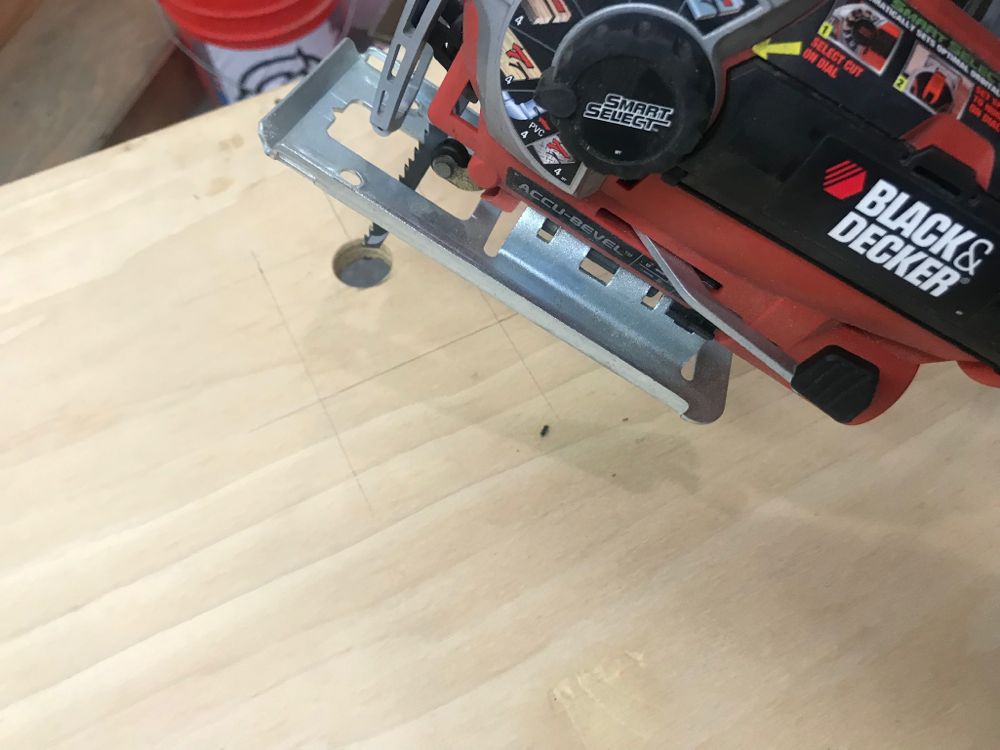
I got a t-square and a ruler and prepared the back panel of the cabinet to be cut to fit the Plug and Play. I used the existing jack hole as the center so I could easily cut into the cover with a jigsaw.
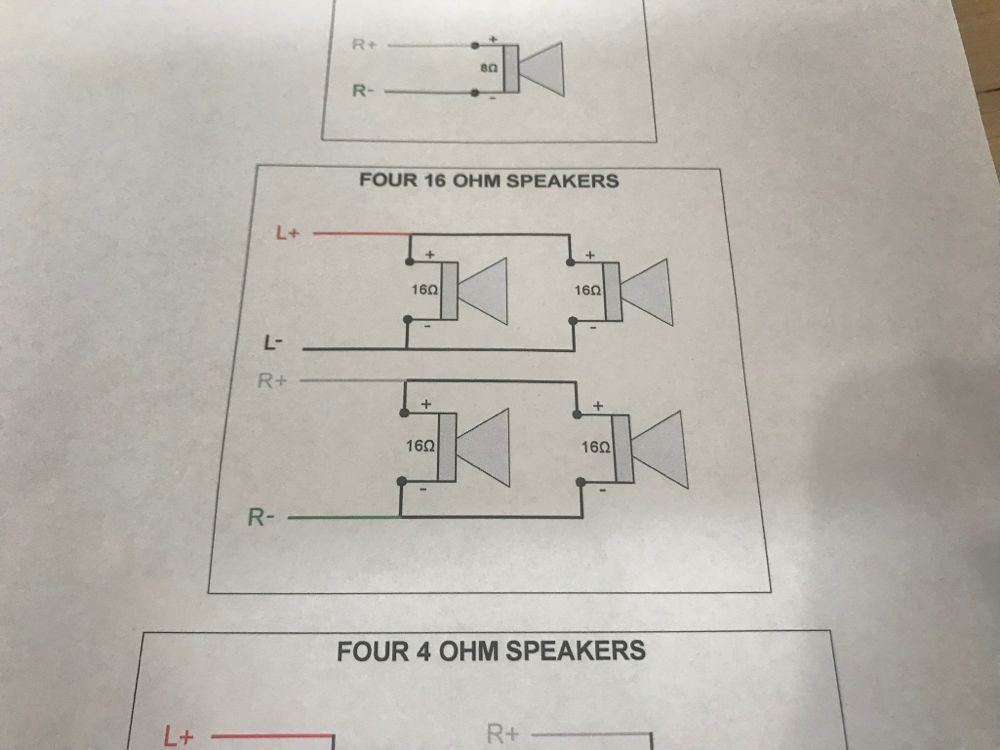
I installed the Plug and Play jack plate with a couple nice screws we had lying around. The Amplified Parts product page for the Plug and Play also includes documents for how to wire up three different speaker set ups [EDIT: also available here s-h700_speaker_z]. The instructions are super easy to follow with color coded wires on the Plug and Play. The wires also have female spade connectors already attached to easily plug onto the speakers. For this cab, I was wiring up four 16Ω speakers.
Easy peasy nice and squeezy.
Before plugging in, be sure to check EVERYTHING with a multimeter. The Plug and Play is inexpensive, but your amp is not. I made sure I was getting correct Ω readings for all the plugs. 3.8Ω is right in the zone for a 4Ω jack.

I screwed the back onto the cabinet and it was good to go. I even managed to save the bent-ass aluminum Peavey SN identifier back onto the cabinet that I’d had to pry off. My boss has a more versatile cab and I have a happy boss. Win-win.
Is that a Peavey VTM cab, by chance? You don’t see those Celestion G12K speakers much.
They are Peavey cabs. Every chance in the world that they are VTM, but I can’t say %100
I bought the jack plate like yours. It didn’t come with Any instructions – not a clue. I just need to know what colored wire is for R+,R-, L+, and L-. Been checking on the web and haven’t found the simple answer I need. Many make reference to the non-existing (included?) diagram.
If you’d clicked the link I provided, the documentation is still available online in the product page under “files.” I’m going to edit this post to include links to the pdf diagrams so you can also find them here.
Hello…
Question:…
My speaker box has two 8 ohm speakers, amp is 4 ohm output…Do I have to use a TRS Cable or can I just use a plain speaker cabinet cable Like a TS? I’m hoping to also be able to plug into the 16 ohm mono when I use my Blackstar Amp do I run a risk of damaging anything if I just use a regular amp cabinet cord?
Use a multimeter set on the ohm reading to test the speaker box with two 8 ohm speakers. My guess is they’re wired parallel to make a total 4ohm load, but you should always test before plugging in. If they’re wired in series and make a 16ohm total load, you could blow your amp. There’s no reason you should ever be using a TRS cord from an amp, the jacks aren’t wired that way. They are mono. You should always use a standard speaker cable.