
There used to be a day when I would put my amp under my car seat for travel. It was an Ampeg B2. I found out that was a good way to have all the EQ knobs broken. Years later I toured with an Ampeg SVT-2Pro rack mount amp… and never bothered rack mounting it. Sure, a guitar always goes in a case. Why bother with an amplifier? It’s just that thing that MAKES IT LOUD.
I got older and poorer, though, while my amp choice got older and more valuable. The folly of youth left me. There was no way was I going to leave on a huge tour again without making sure every amp had a case, especially the vintage Ampeg V4B I was now playing through. When we headed out with GWAR, Sean borrowed a case, we got Dan one while on the road, and I… of course, I had to cobble something together that was special.

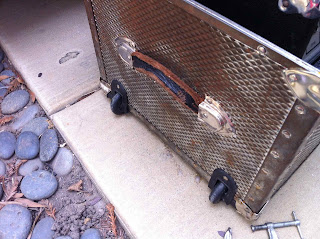
I started with this little gem that was tossed for junk outside our practice studio. It was broken and battered, but had a lot of potential.
When I found it, the hinges were out of whack, the latches didn’t latch, and it was devoid of any padding. One thing I really liked about it, though, were the recessed wheels on the side. My V4B isn’t the heaviest amp in the world (unless you’re counting the tone), but anything to save my back for old age is a blessing.
To fix the latches, I bought some steel rods from the hardware store. I bent them into shape using a vice. To get the more acute angles, I scored the rod with my Dremel cutting tool and they folded into place.
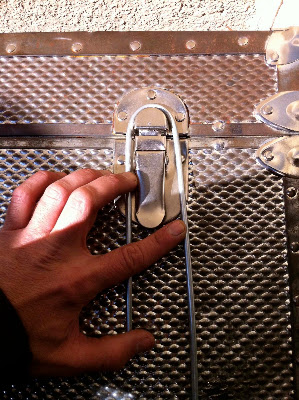
Once I had them in shape, I put them back into the latch and used a vice clamp to fold them in tight.

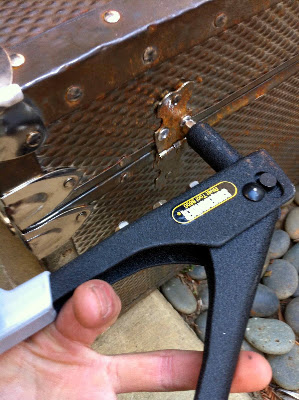
The hinges were falling off the case. The original pop rivets had come undone, so I put in some slightly larger ones with washers to take up the slack.
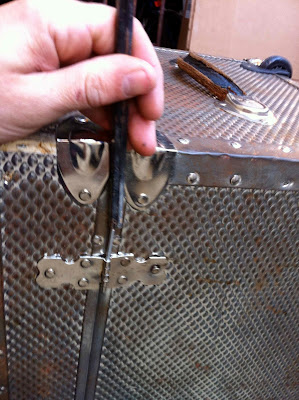
I also had to replace one of the hinge pins. I used the end of a pop rivet and hammered it in. A few weeks into tour, this also came out. Damn. I ended up using one of my .105 gauge bass strings and bent it around the hinge. I always knew those things must have a use beyond making my cacophonous bass-tard noise.
With the hardware refurbished I set about to design the best interior space for my needs. This case happened to be pretty deep, fitting my amplifier in it with a lot of headroom left over. I’d seen some road cases designed with false bottoms to store foot pedals and cords. I liked that idea a lot and thought I could arrange it in such a way as to make it easier to set up on stage and load it all out.
I had to consider the order in which I would do things. I’ve accumulated a lot of things for my gear set-up.
1. Set up Basshangar with mic clip on top of cabinet
2. Put amplifier on top of cabinet over bass hangar
3. Plug in Sansamp Bass DI
4. Plug in Sennheiser ew100 G3 wireless unit
5. Attach Sennheiser MD-421-U microphone to clip
Reverse the order, and that’s how I would pack things up.
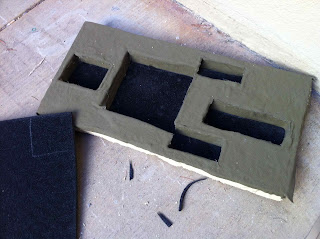
The little things would go in first. I’d scored a huge amount of hard foam from a grocery store that had been closing. This foam used to keep my veggie burgers cold. Now it would protect my gear. I cut it to fit tightly into the bottom of the case and made cubbies for the wireless, the DI, the microphone, the power adapters, and the cables.

I had a bolt of thick curtain material left over from a home improvement project. I glued this to the foam using spray adhesive. Contact adhesive may have been a stronger choice, but the spray was easier to use. I also cut out pieces of polyethylene foam to line the bottom of the cubbies. Polyethylene is the kind of standard rigid foam used in most road cases.
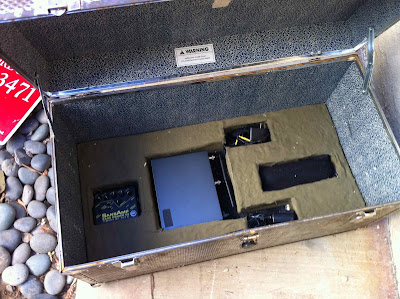
With the foam placed inside the road case, all my little parts will fit and be snug underneath the heavy amp. And just to be a little snide, I’m the only one on the tour who didn’t lose or break a wireless antenna. Mission accomplished.
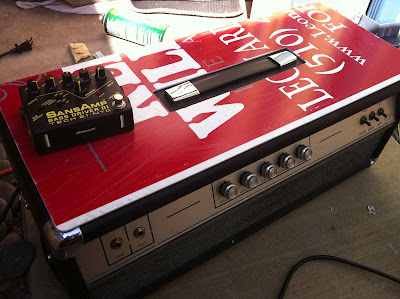
I didn’t have any thin wood to make a false bottom. I also decided I wanted something dual use. I cut up a thick piece of plastic from an old real estate sign. It would act as a false bottom and also sit on top of my amp as a table top for all those little widgets I’d added to my set up. It came in real handy, too, when I could just pick that slab up and carry off all the crap in one go. Doing it again, I might seek out a firmer piece of wood and even put gutters on it. There was more than one time on tour I thought it was all going to slide off as I navigated dark stairs.
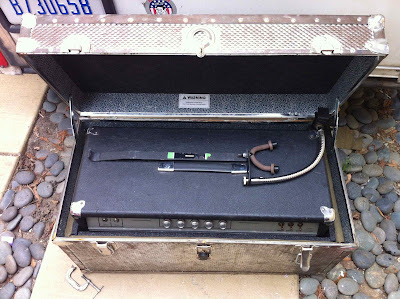
I needed to make the sides of the case fit my amp snugly. I didn’t want to just use the polyethylene foam to build up the walls. I didn’t have a lot left and it is expensive, besides. Instead, I built up the walls using more of the free foam I’d gotten from the grocery store. I cut it up and glued more of the drapery fabric to it. That wasn’t just an aesthetic choice. The drapery cloth kept the foam from dropping crumbs any time it might get chaffed.

Once I’d used the cheap shit, I added a layer of the nicer polyethylene foam to the top of the case and to the sides that would actually touch my amp.

Once it was all put together, there was just enough room to put my Basshangar / mic clip combo I’d made previously in there on top of my amplifier. Now all my stuff was safe and I had the perfect system for setting up and tearing down!
Well, it WAS the perfect system. And then I had to keep lending out my mic and mic clip to all the other bands. And then my amp died and I had to keep getting stuff out from underneath it. And then… well, then I came home. Now my case will sit by idly, but totally ready to protect my stuff for another kick ass tour.