
Somewhere in the ’90s, everything became disposable and cheap. NAFTA made lives disposable and cheap. Reality shows made art disposable and cheap. Music companies made their gear disposable and cheap. I have not the inclination to make the philosophical leap as to why. What I do have is a good example of this. SLM Music, who owned the Ampeg name in the ’90s, put out the worst version of an Ampeg 8×10, the “Classic” 810E cabinet. It has eight 10″ speakers and is based on the original winning design from the ’70s. They are made so poorly with shit wood, however, they are often left to rot rather than fix. Well, I said fuck that. One of these fell into my hands, crumbling and falling apart. I brought it back to life.
When I dragged this out of the apartment from the folks who bestowed it on me, it was missing the bottom entirely. It had the prerequisite tolex rips of every punk rocker’s cab. The baffle board rocked back and forth and could bust your fingers. It was missing a speaker. I rebuilt the bottom, replaced the speaker, and the cab served me well on a few tours. When I sold my Ampeg SVT-2Pro to my bud Brian from Merdoso and formerly of Stormcrow, I offered the cab as part of the deal so long as he covered the expense of a heavy-duty restoration so I could have some fun making the monstrosity punk-proof. And fun I had.
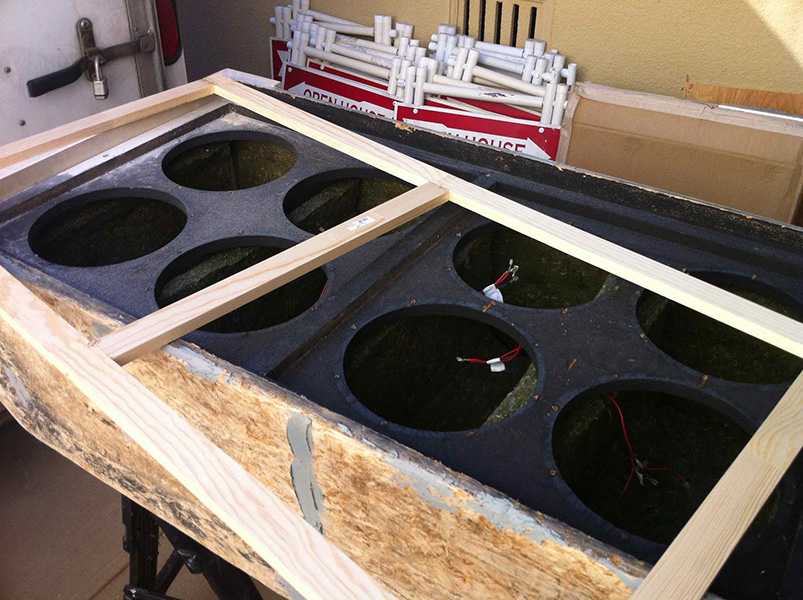
The main problem with this era of 8x10s is the wood. SLM really cheaped the fuck out and started using OSB, “oriented strand board,” instead of the traditional and much stronger baltic birch ply. OSB plywood is made from sheets of scrap wood glued together in layers. It’s fine if you’re putting it inside of a wall, but not so great if you’re using it as the side of a heavy box that some numbskull bassist is lifting in and out of a van every night.
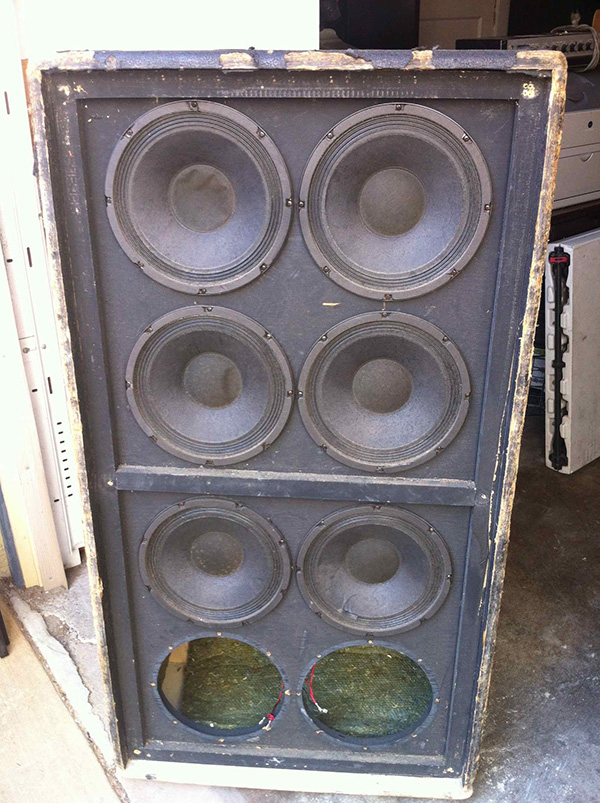
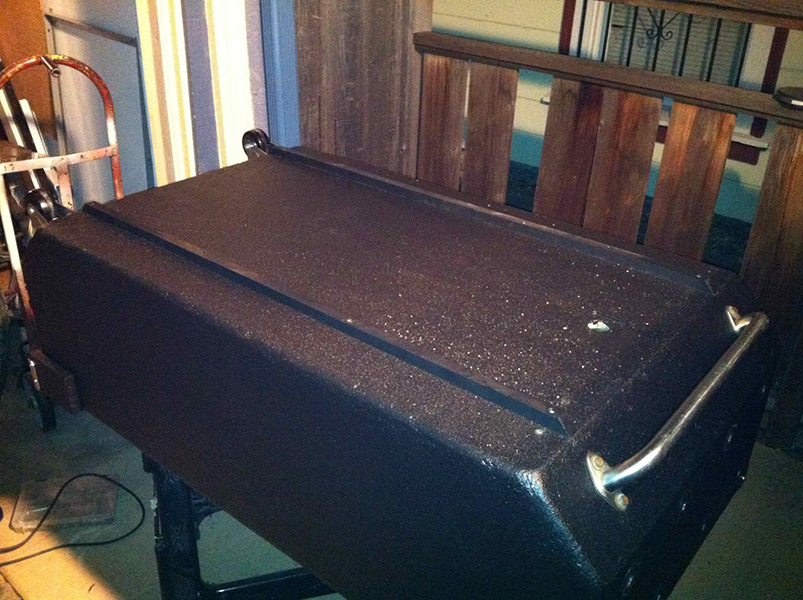
The sides of this guy here were totally pitted. It had lost one speaker again, the other was used for another cab. The grill had been mangled so I just threw it away. My initial repair work had gone south half-way through one tour, so it was littered with screws. The original jack plate on the back had long been missing and replaced with a cheap alternative. Ugh… what a sight.

The bottom panel I’d custom built was actually holding up the best. The casters had been salvaged for the Ampeg 1540HE I’d restored before. I’d used 3/4″ baltic birch ply, good and sturdy. I lacked a lot of carpentry skills when I did this (still do), but managed to cobble the two panels together with a skill saw, a sander, and some determination. Please, someone buy me a table saw and router.
While these bottom panels worked well with themselves, the wear and tear of the two noodniks who drug this cab around without a bottom had gone too far. The OSB was worn down and barely could hold a screw or glue. I wanted my friend Brian to have a cab that was punk-proof, so I had to reinforce everything. I thought about cutting out pieces of the bottom and replacing them, but went with a different approach. Kind of like when Charlie Brown puts a scarf round his head for a sore tooth, I’d brace the bottom against the sides.
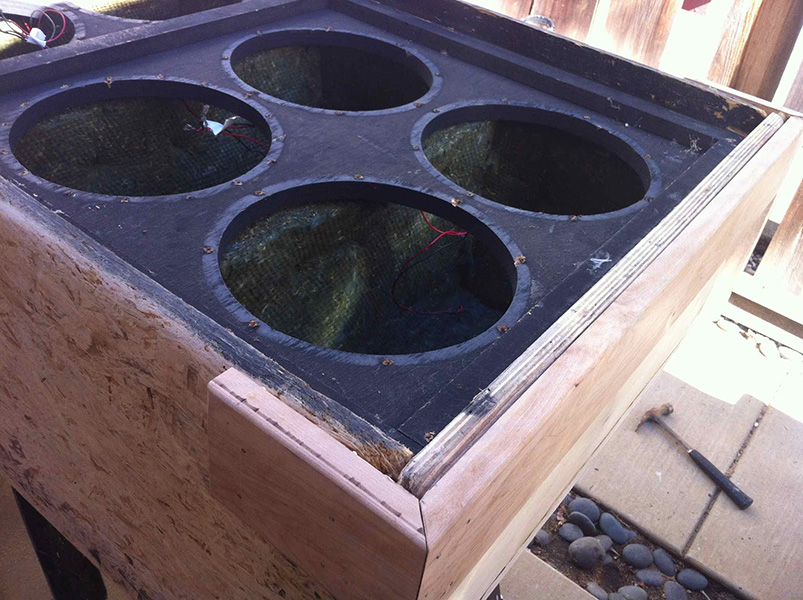
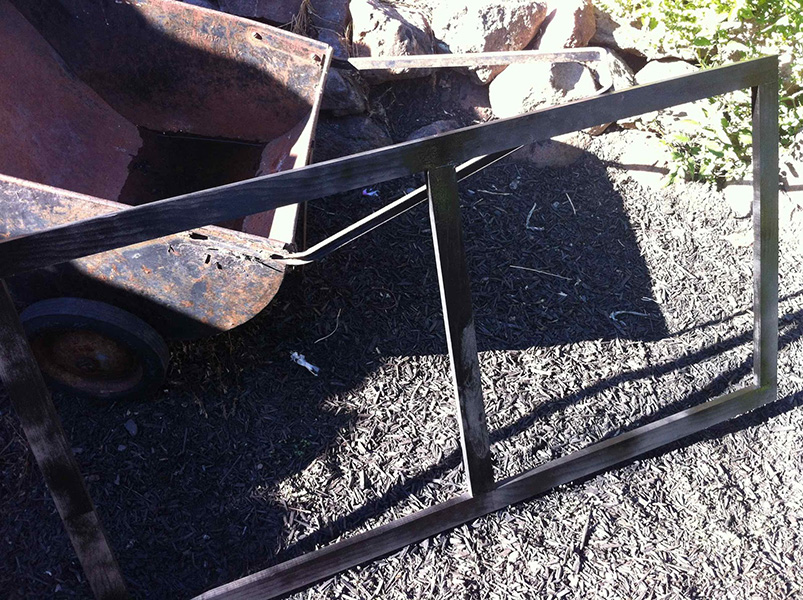
I got some 4×3/4″ baltic birch wood and made the brace. In this pic, you can see how worn down the corner of the OSB is. I glued and used finishing nails to attach the brace to the bottom of the cabinet.
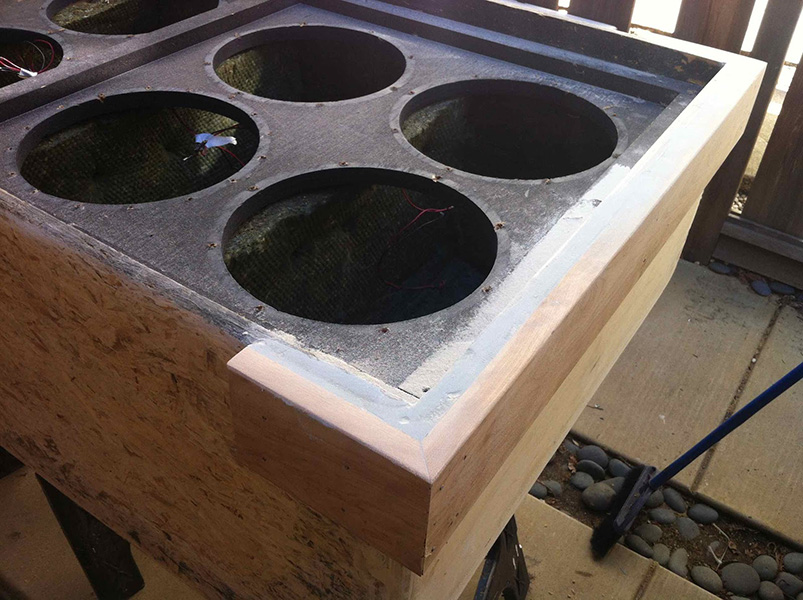
I routed the corners of the wood with my Dremel router (I really need a real router). I filled in the gaps with some Evercoat Universal Repair Filler for a consistent surface. This stuff is a two-part mix and really strong. I also used it to fill in lots of dings and scratches along the sides and even the corners up top where I was going to install new corner protectors.
I can’t say I did the most amazing job making the surfaces like new, but I did a pretty good one. Tolex would’ve covered up any imperfections. There was just a few problems with that idea:
1. With the brace on the bottom, this would be a very difficult job to Tolex
2. I don’t know how to Tolex anything, and I wasn’t gonna start with this
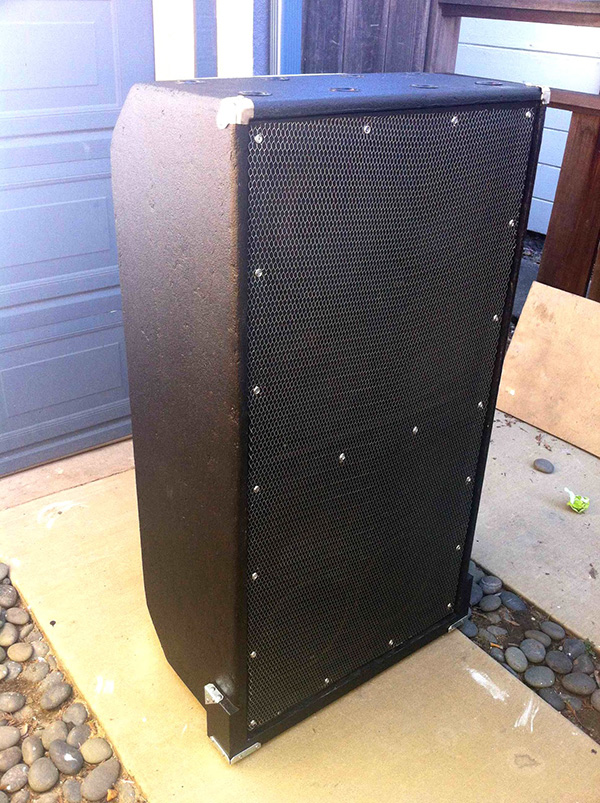
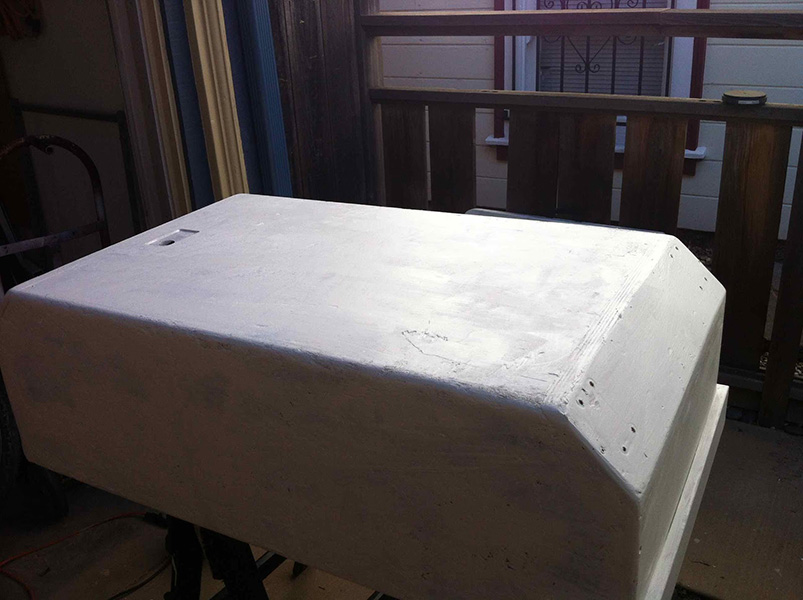
Which is why it is painted with some Zinsser 1-2-3 Primer. I’d planned on using DuraTex Speaker Cabinet Coating paint instead of Tolex. It’s made to cover music gear and properly applied, simulates the look of Tolex. I’d read it didn’t need primer, but I’d also read some people had problems with it sticking to surfaces that had filler in it instead of just bare wood. Hence, the primer.
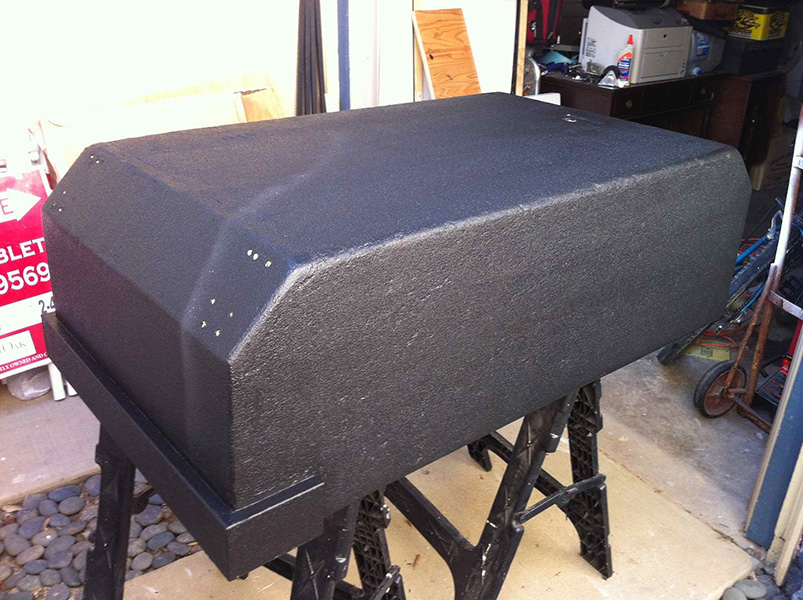
The DuraTex is applied with a foam roller that creates the texture. Lots of experimenting can be done here to create different textures with smooth applications by brush followed by the foam roller, extra thick coats, etc. Basically, I’m impressed as shit with this stuff after my first time trying it. It applies easily, cleans up with water, and dries within hours.
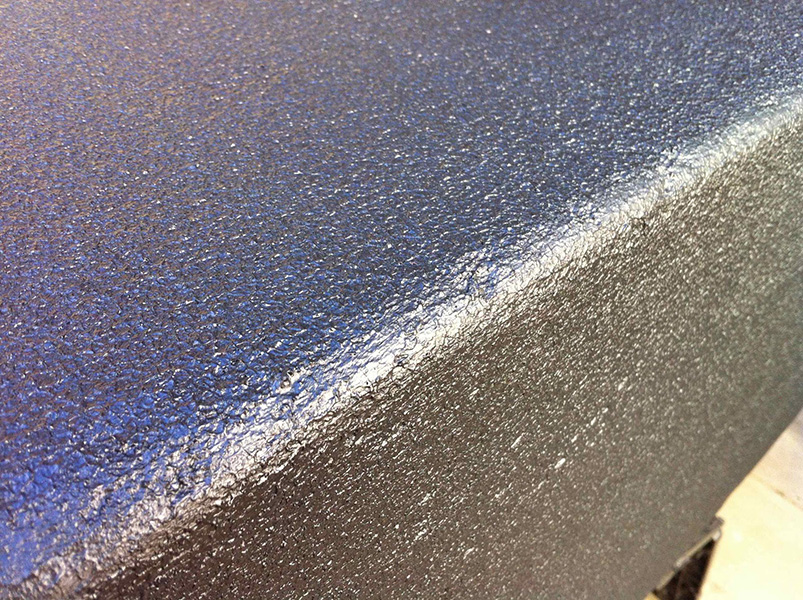
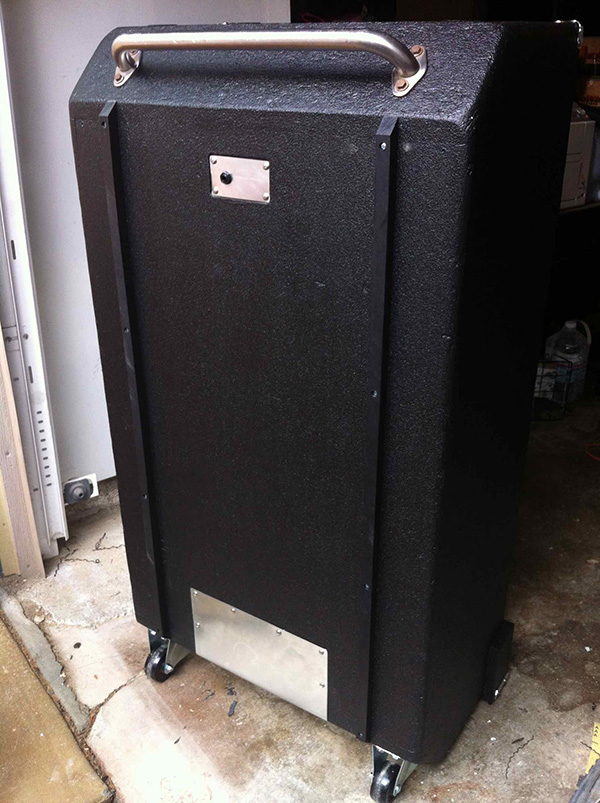
The look is super impressive. From a short distance, it really does look like Tolex, minus the fact you can see some of the more major dings and seams in the wood underneath that I failed to hide completely. The wood could have been left bare, for all Brian cared, but it wouldn’t be protected against the elements.
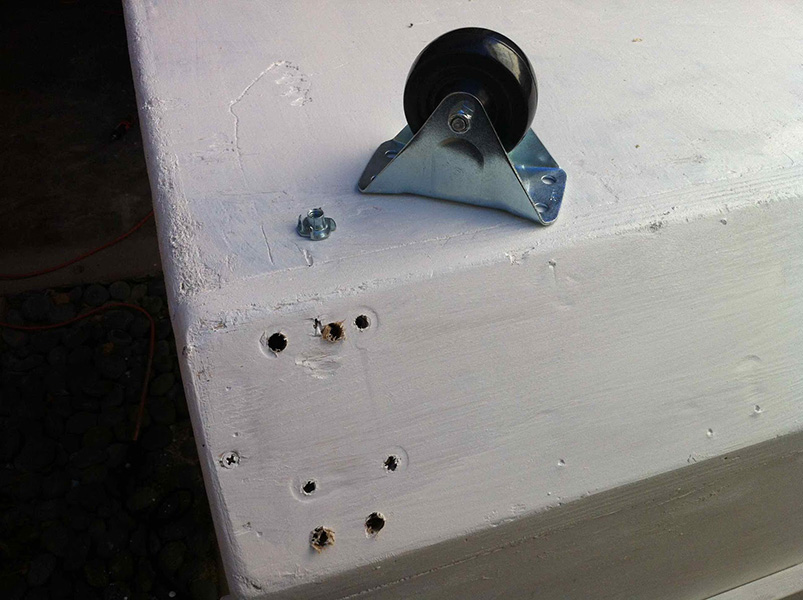
The OEM casters this cab had were installed in another project. I really didn’t feel like ordering more casters online, waiting, blah blah, and then having them unavailable locally if they needed to get replaced again. Here’s the same size 3″ caster in a different housing, cheaply purchased from any Home Depot, Lowe’s, etc. It has a taller, but thinner base. It rides a little higher than the OEM casters from Ampeg. In this case, that was perfect because of the extra depth of the wood brace I’d added.
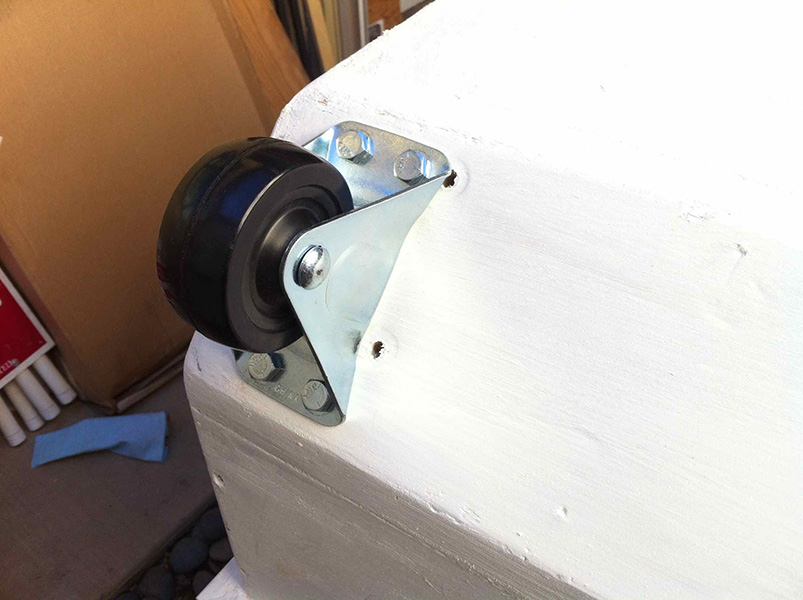
I drilled some new holes, threw in the t-nuts on the opposite side, and bolted the new casters on. In hindsight, I might have placed the holes closer in on the cabinet… those outer holes were so close to the inside wall of the cabinet, the t-nuts almost didn’t fit.
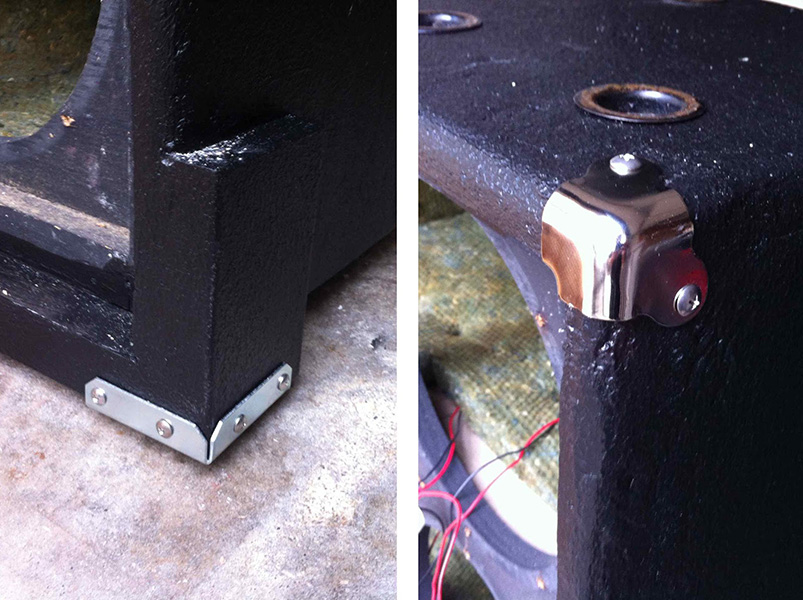
I used traditional style Fender cabinet corners for the top of the cabinet. I had to get those online. For the bottom brace, I was able to use some 3″ corner braces available at most hardware stores. I also later added some 2″ corner braces to the back-top of this area, because I thought it would be nice to protect the wood brace from getting bashed by door jams while being pulled into clubs. Instead of wood screws, Ampeg uses #8 1/2″ truss head sheet metal screws for this application. They have a much nicer look, I guess. I found matching ones at ACE Hardware, but not Home Depot or OSH. Go figure.
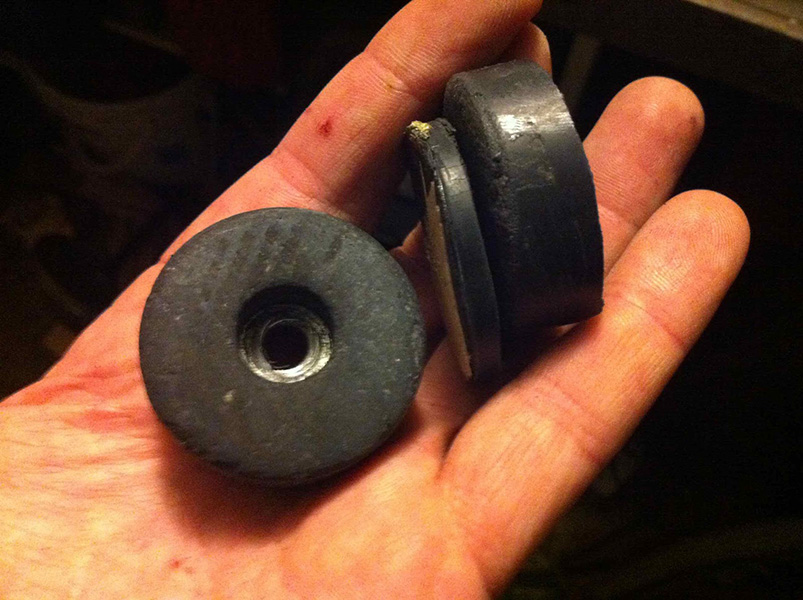
I put new rubber bumpers on the brace, about where they’d been on the original bottom of the cab. Because of the sizing of the brace and the casters, I had to cut the bumpers a bit to make sure the cabinet stayed even with the ground.
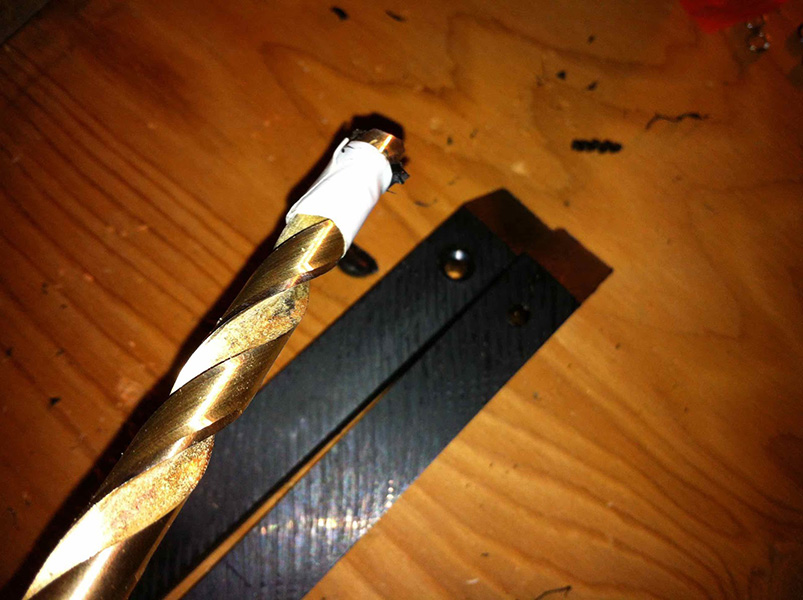
At some point, SLM started adding plastic skid rails to their Ampeg 8×10 cabs. I liked this idea a lot, so I wanted to add them to the cab I was restoring. I went to Tap Plastics and had them cut two 3/4×3/4″ pieces. I took these home and put a 45° angle on the ends so it would match the back of the cabinet. I drilled holes for #8 screws through. I then expanded these holes halfway so they would fit the whole head of the screw inside the rail. This smooth surface would allow the cab to be drug on and off stages without actually touching the finish on the wood.
The other thing that was added to the 8×10 30 years after it’s initial introduction was a kick plate to the bottom. So… why the fuck not add one to this.
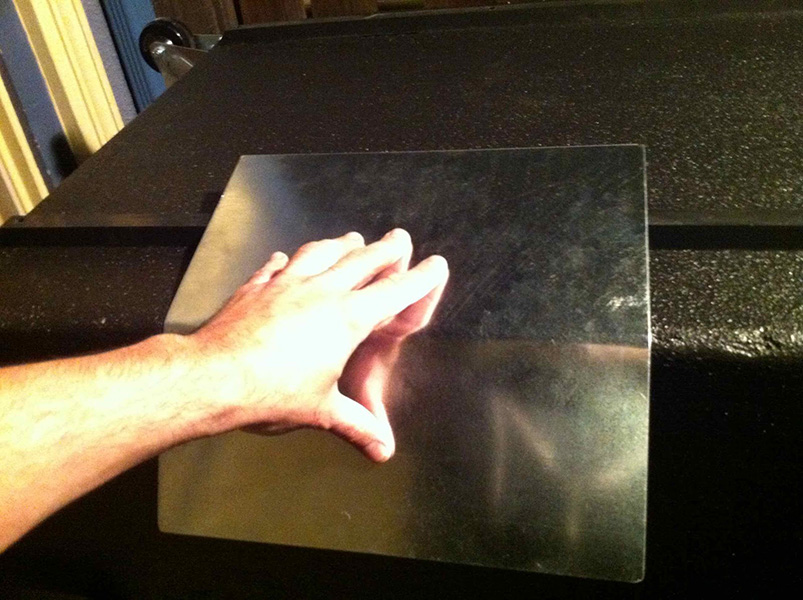
I got a cheap sheet of aluminum and rounded the edges a bit. It bent really easy over the side of the cabinet and was fit nicely.
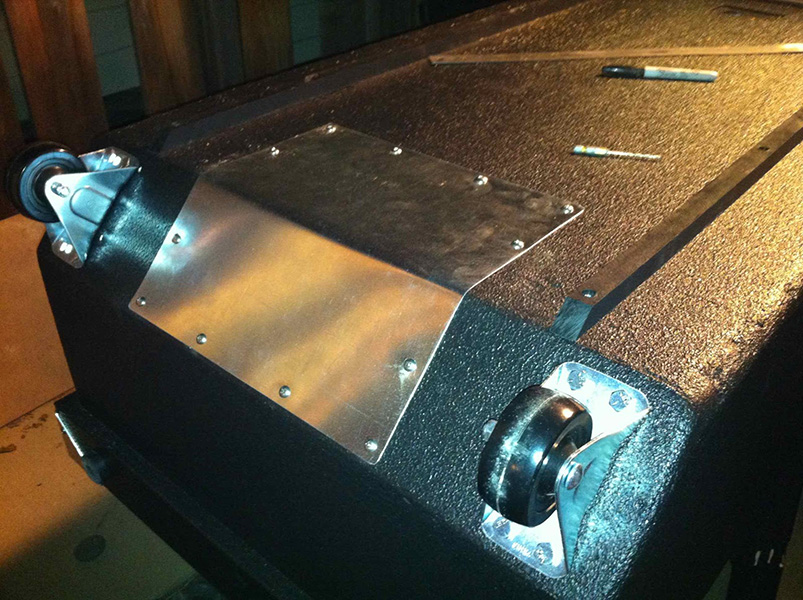
I used the same #8 truss head sheet metal screws here. I didn’t even have to drill the metal, I just punched it with a nail. It’s a small touch, but should help with scuffing of the finish and the wood. It also looks kinda Mad Max-ish.
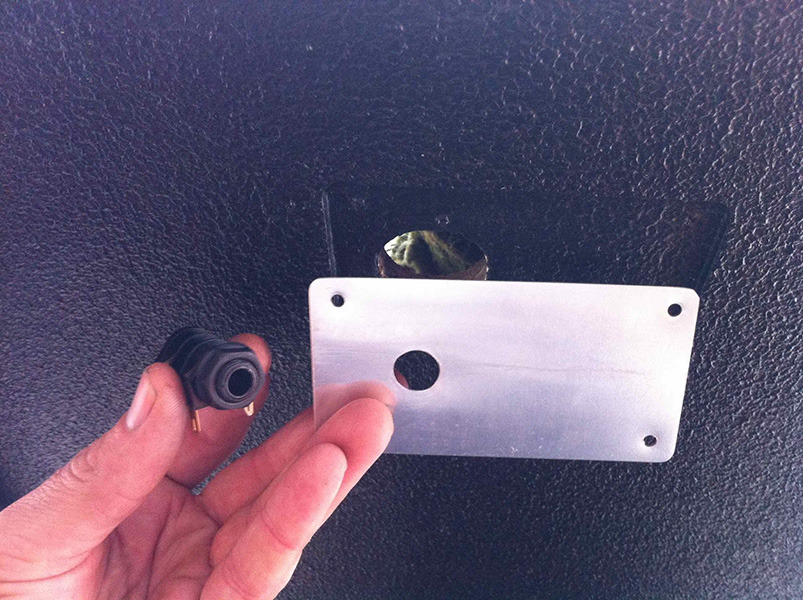
For the missing jack plate, I used the same cheap aluminum sheeting and cut it to fit the recessed area. I thought about installing a Neutrik speakON connector. I even found one that works for speakON and standard 1/4″ plugs. In the end, I didn’t like the way the dual jack would be mounted, so I went with a standard jack. I chose to use a gold-plated plastic jack because I liked the way the black nut looked. Vanity is a bitch.
The back of the cabinet was done and looked great. Now the front came to the fore, as fronts are apt to do.
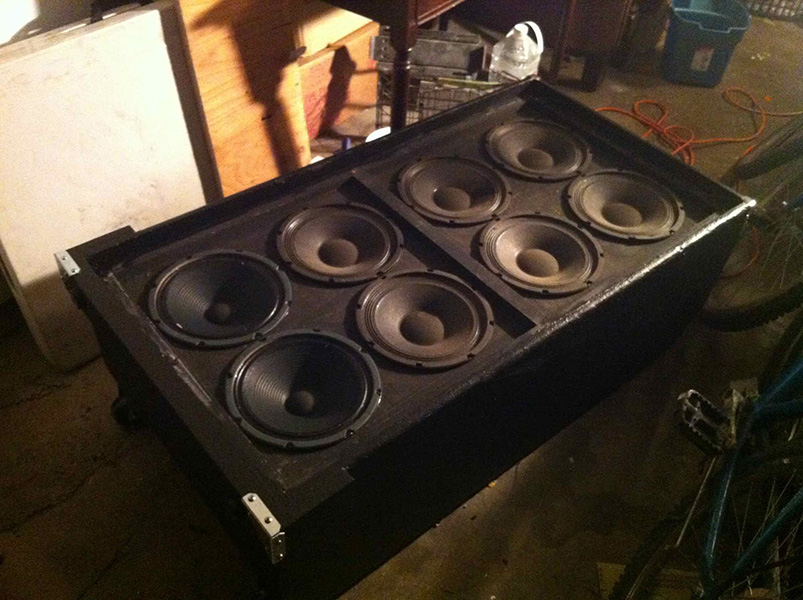
The two missing speakers were replaced with cheap Jensen MOD 10-50 10″ 32Ω speakers. Brian was looking to keep costs down, so we didn’t go for the high-end Eminence replacements. The current review is “the cab sounds amazing!” so I guess the MOD speakers worked just fine. As luck would have it, I actually had all the original speaker mounting screws. If you’re looking for replacements, though, you need black #8 1″ pan head sheet metal screws.
My next issue was the grill. The original frame was so busted, it was unusable. I built a new one from some cheap pine wood.
I spray painted the front and sides with flat black spray paint so it wouldn’t show through once covered.
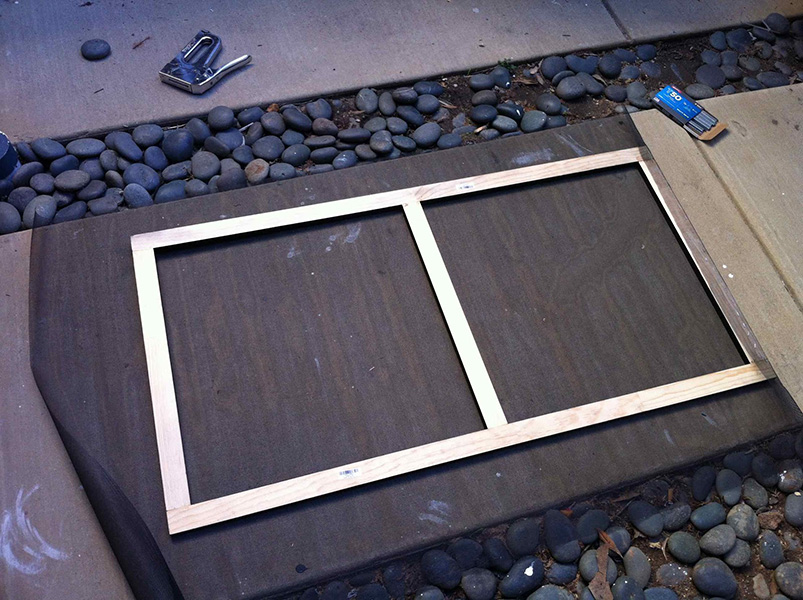
Instead of using expensive grill cloth, I opted for black screen door material. In retrospect, I probably could’ve spent a little more and gotten the kind of screen door material meant to withstand animal abuse. The stuff I got is pretty thin. I used a staple gun and pulled each side taught and stapled it down with a ton of staples. It’s very similar to stretching a canvas, something I did a few times back in my college days. It’s a pain in the ass. The lesson here is, be careful with your original grill.
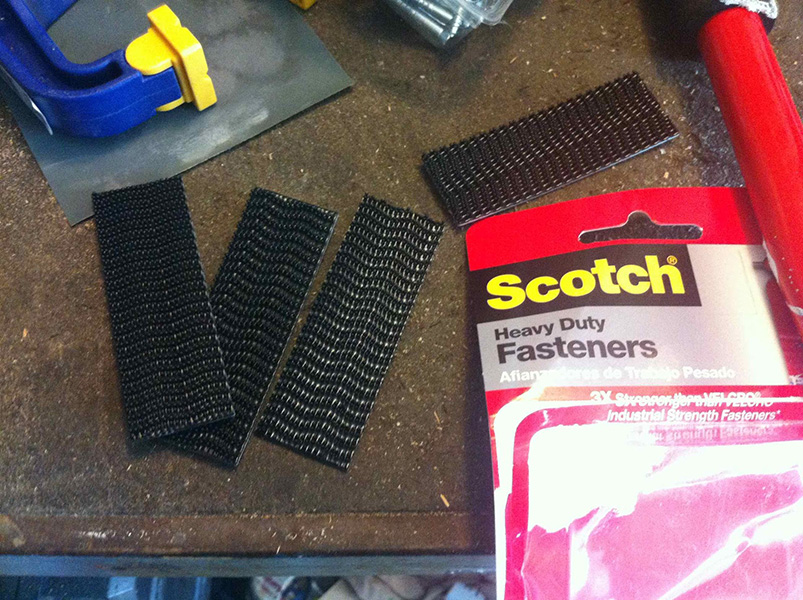
I used these kinda Scotch heavy duty fasteners because they’re very similar material to the plastic screw-on grill fasteners Ampeg uses. I didn’t feel like ordering those, though, and found these at the local hardware store instead. Sometimes I just eschew the Internet, but if you’re so inlined (nerd), you can get OEM style grill fasteners from fliptops.net.
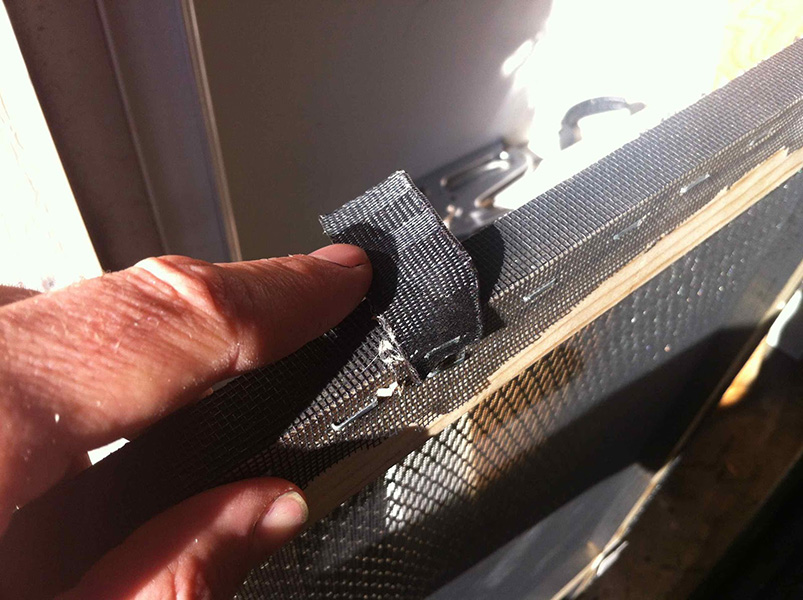
I also added a pull tag to the grill. Have you ever tried to get a grill off and found yourself cursing and ruining the adjoining wood? Well, I just stapled on a little scrap off the end of a seat belt. Now the grill pulls off easy, peasy, nice and squeezy.
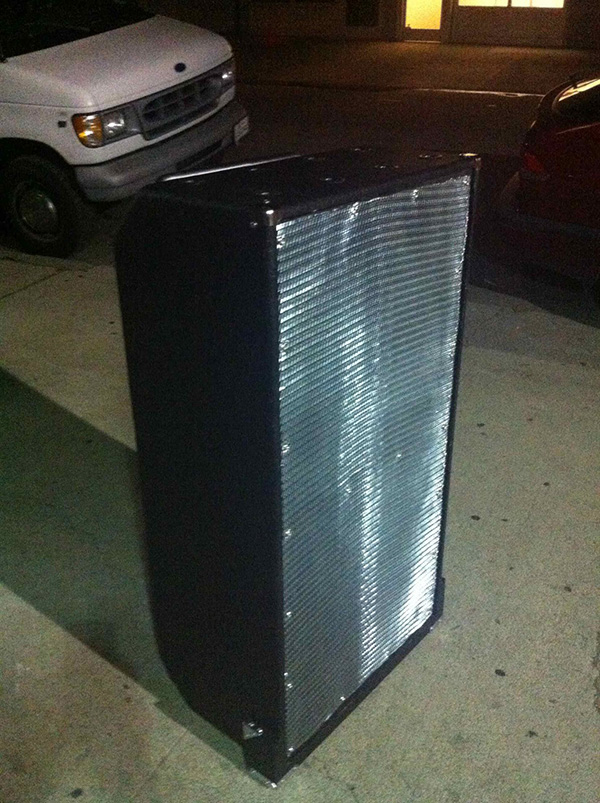
Apparently, I forgot to take photos of the final bit, adding a metal grill over the cloth one. I bought some fairly fine mesh aluminum flashing from Home Depot, cut it down to size with my Dewalt angle grinder, and screwed it on. It adds an awesome sheen to the front of the cab for just a few bucks and protects the grill cloth from any errant drum stands poking through it.
All this was done for around $130. That includes the $50 gallon of DuraTex, and I have plenty left over for future projects. Brian is stoked to have a renewed 8×10 cabinet and I’m stoked to have some extra shit outta my garage. Newer Ampeg 8x10s appear to be made better, but there are a myriad of this cheaper era 8×10 littering punk jam spots all over the country. They sound great, though, and can be brought up to snuff for not much dough. Any idjit would do hisself a favor to take a little bit of time, before it completely falls apart, to do a few upgrades and make that shit tour strong.
Thanks for sharing this excellent step by step, I'm going to give it a try. I priced the bedliner guy and he said a typical truck tailgate would cost about $175, I figure an 8×10 E would cost at least twice that. I agree that given the Tolex ripped off the OSB so easily the first time ,doing it again would be a waste. I was wondering how the Duratex was holding up since you wrote the blog. Another guy used basement water proofing mixed with sand on his homemade 8×10 project, with pretty good results. To me that stuff stays pliable, I could see it peeling away in huge chunks. Great Job, looks to me like you are a dude with many talents. Paul
Last time I saw my friend who bought the cab play, it was holding up well. Mighta had a few scratches in it. The cool part about the Duratex is that you can just cover up any scratch and the patch is invisible. I had a lot left over even after extra coats, probably enough to do 2-3 more cabs.
looks great, had to restore one myself, mine wasnt in as bad condition, was made in 78 which makes it 3 years older than me, lucky enough to have all the original magnavox speakers in it which is how i found the date. anyway was low on funding and had a bunch of interior exterior house paint, making story short same thing, tolex ripped of very easily i took all the hardware off and went to town with a roller and a cut brush obviously doing cuts first, looked so good my friend greg hensley bass player for diesel boy said it looked great and asked where i got the lime green tolex, told him there is no tolex that i rolled it on with a rolle and it made it look like tolex, looks great, just saying though definitely going to steal your flashing idea for a kicker, great idea.., you svt8x10 looks amazing, from one punk to another, very nice.., now i know how im going to fix my grill, just going to wait till it gets a little worse, guess im lucky to have got it in the shape it was, 480 bucks at guitar center, is up there with my best buys.., keep up the good work..
You got a '78? Lucky duck. Those were made from good, durable baltic birch and can last a lifetime.
I just picked up an elusive SVT 215E. She's in sad shape and could use a restore… I've been wanting to restore my 810E as well, now I can do both and I think I'll go custom color with the Duratex… great step x step write up!
Awesome! Be sure to mail me some pictures to post when you finish.
Will do! I see you used pine for your frame. What method(s) did you use to fasten the joints together?
–Joe
No, I used baltic birch. It's fastened with some finishing nails and a lot of wood glue.
I really hated seeing you use that speaker jack. I think it is a Neutrik jack.
I built up two 15" cabs a few years back, and used these connectors. Speakers were JBL K140's.
Several years later, I felt the sound was not what it used to be, with several amplifiers, and discovered that the metal in these connectors that touches the male plug, when plugged in, had burned and sort of crystallized and was making a poor, high resistance connection.
I replaced all with good old "Switchcraft, and all was good again, and has stayed that way.
I will never use those cheap (not cheap $) connectors again.
I have a 1971 SVT Blue Line and a mid 80's 810e.
The 810e now has green carpet on it, and your article has been an inspiration to me to do this 810e up right.
Thank you! Bruce on the coast of South Carolina
Ampeg SVT- "can you hear me now!?!!!??"
Agreed, these connectors do have their problems… I've replaced several in old Ampeg amps that degrade and corrode over time. Perhaps I should've used a plastic back plate? But this was partially restored with an aesthetic in mind, so, you know…