
With all the emphasis on amplifiers, pedals, cabinets, the humble speaker is oft forgotten. It’s the final destination for your signal and it’s the only thing you actually hear. What’s in your cabinet? If your speakers are crap, who cares that your amp is hand-wired? It’ll still sound like crap. For this discussion, what if it’s broken? Can you tell? The most common injury to a speaker will not necessarily stop it from working, but it won’t work well. When yer speaker cone rips, your tone cannot.
The first time I employed the following fix, I was on the road with my friend Christy. One night, we noticed her guitar sounded terrible. Upon inspection, the sound person had mic’ed a G12T-75 speaker in her cabinet that had a hole in the cone. Three other speakers had been somewhat masking the bad one, but that terrible sound had been coming out all along. We fixed it using an old roadie trick invented back before Guitar Centers were on every corner. Now that Guitar Centers don’t even carry guitar speakers, this old roadie trick is handy again.
A speaker is basically an electro-magnetic motor. The cone is attached to a coil that becomes an electro-magnet when your amp sends it a signal. That pushes to and fro against the permanent magnet surrounding it. The actual sound you hear is the cone vibrating and pushing air. That’s why decibel, your level of loud, is measurement of air moving. With that understanding, you can understand why a ripped cone is a big problem.
The temporary fix for these woes is simple, exemplified in his picture of Christy’s fixed speaker cone.
No, that’s not a speaker-fix-it kit from the local speaker repair shop… because that doesn’t exist. Don’t be a dick head. It’s nail polish and toilet paper.
A little warning here. Emphasis is on the word “temporary,” as far as a fix goes. This will make your speaker sound better. Once the cone’s integrity is compromised, however, it won’t work again at optimum levels. It will lose some of its dB efficiency. The speaker should be replaced or even re-coned, if it’s valuable enough for that expensive proposition.
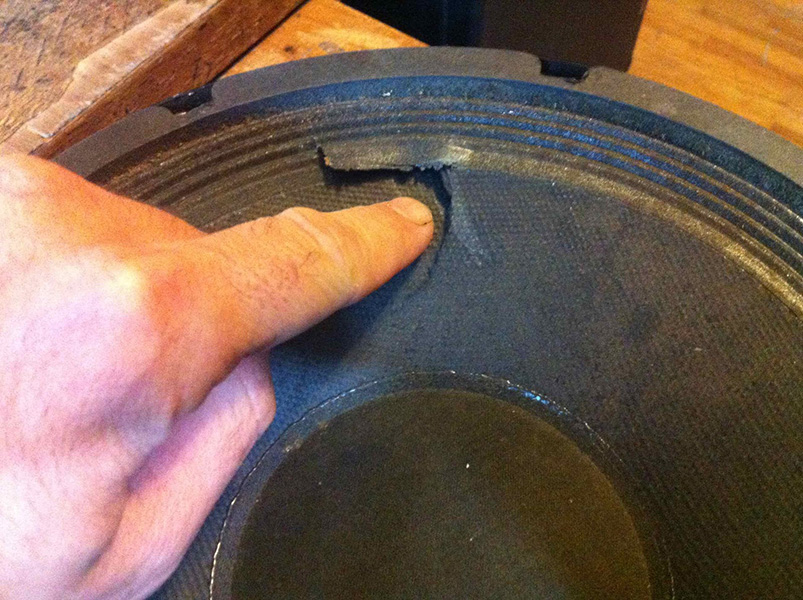
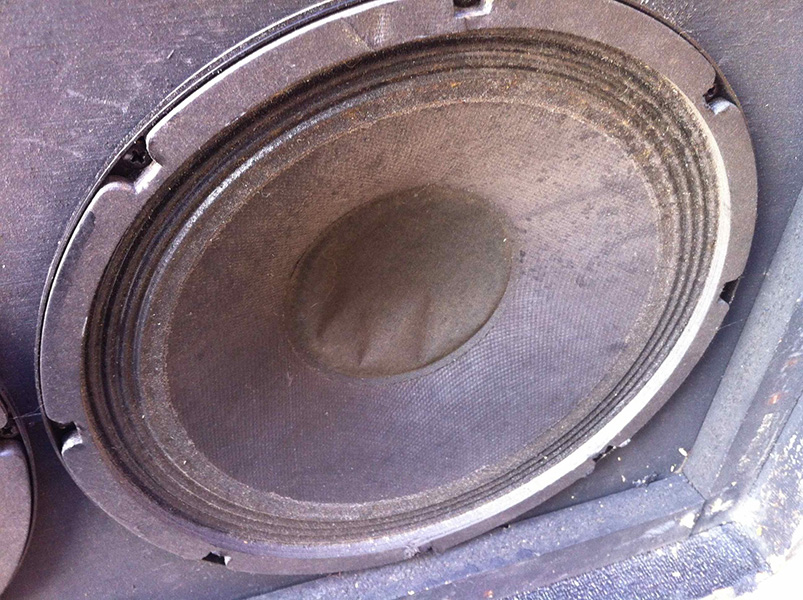
And onto the problem I had; a careless roommate of mine placed his golf clubs against a shoddy 8×10 Ampeg “Classic” cabinet sitting in my garage. I ain’t got the dough or the desire to replace one of the stock Eminence speakers in this creaking, shambling mess of a crappily made SLM-era late ’90s particle board monstrosity. I’m planning on giving this thing away, so I’m just gonna patch the speaker cone.
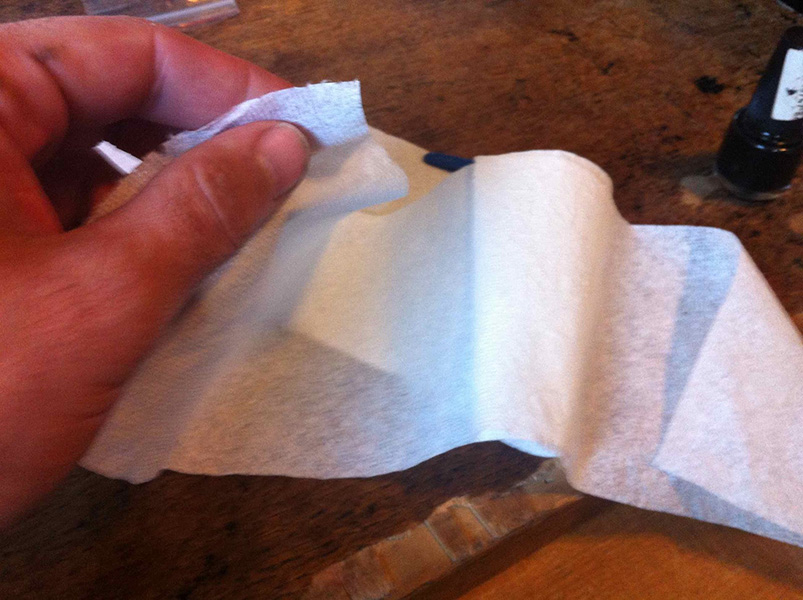
I start with some common toilet paper. Why toilet paper? Well, if it can withstand the rigors of the my shit after a night of drinking and jalapeño poppers, it can take on any damn amplifier. It’s flexible enough to bend with the cone a bit and will absorb the enamel nail polish I will use for coating.
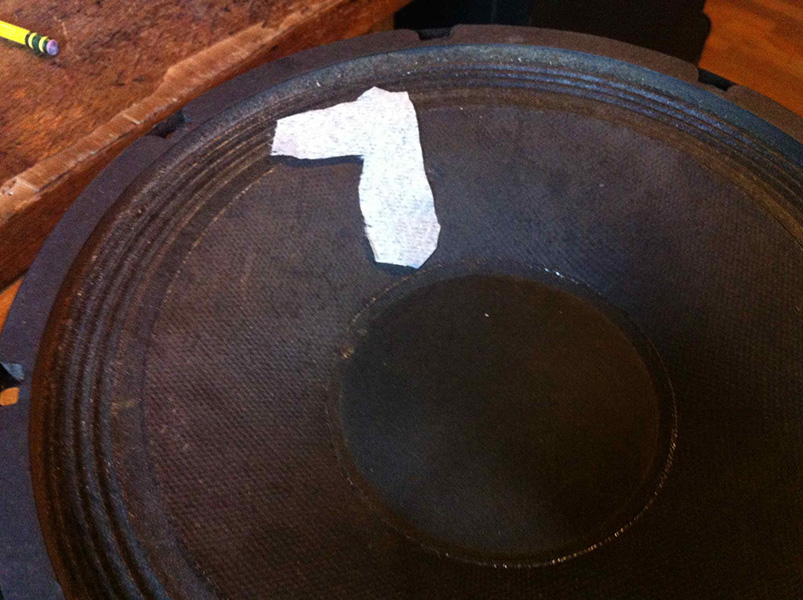
I strip the two-ply paper into one-ply, and then cut it into a good patch shape. Unfortunately, this rip went into the surround, or “suspension” area, and is quite large. This speaker will probably lose a lot of potential volume, but fuck it. I don’t care at this point and it’s the best example I have of this put up on my blog.
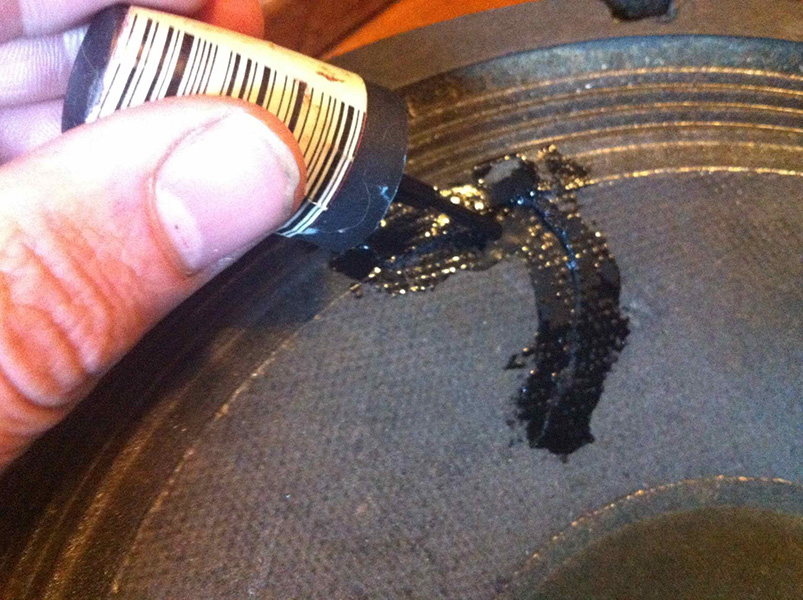
A bit of nail enamel is laid down quickly for the TP to grab onto, and yeah, I got my own nail polish. Wanna make something of it, turkey? When you put the TP down, yer likely to get nail polish all over your finger tips. It’s handy to have some nail polish remover around. Yeah, I own that, too. Suck it.
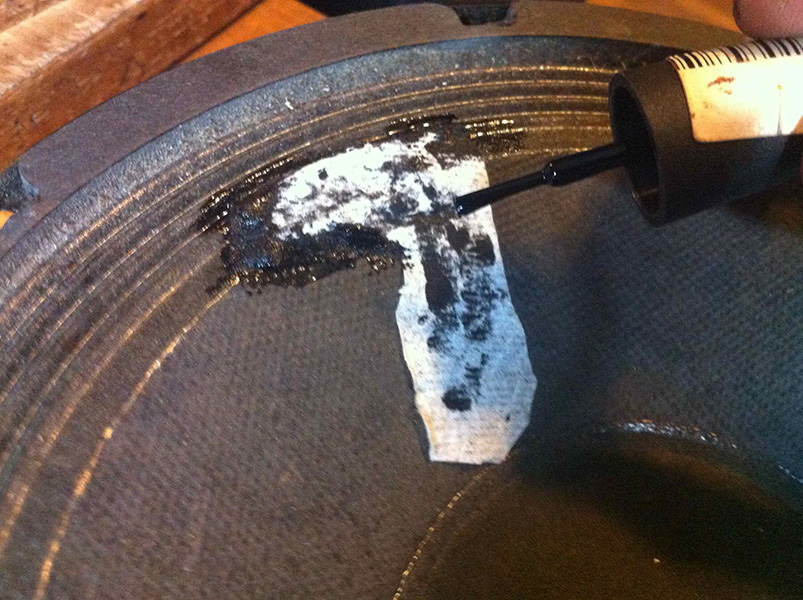
Once the TP is sticking, polish needs to be applied on top and to the sides of it, sealing it to the cone.
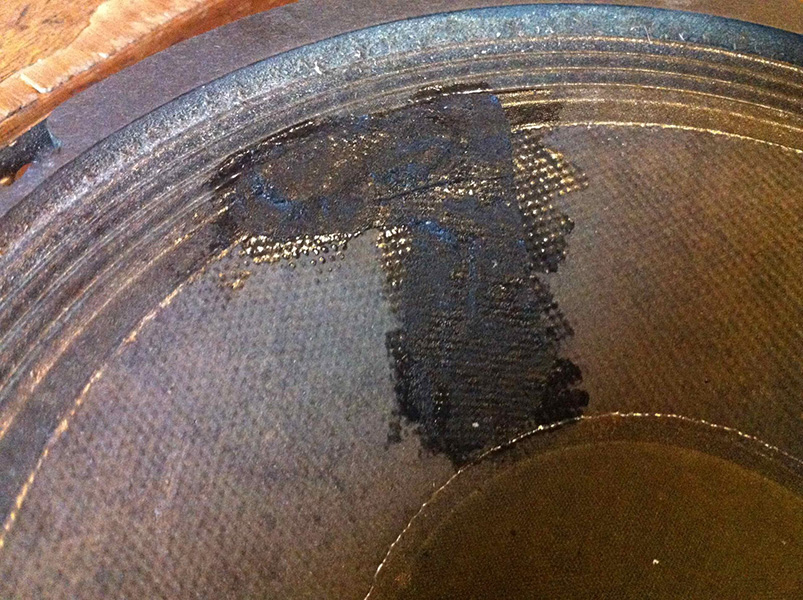
Once the patch is complete, repeat the process on the basket side of the speaker.
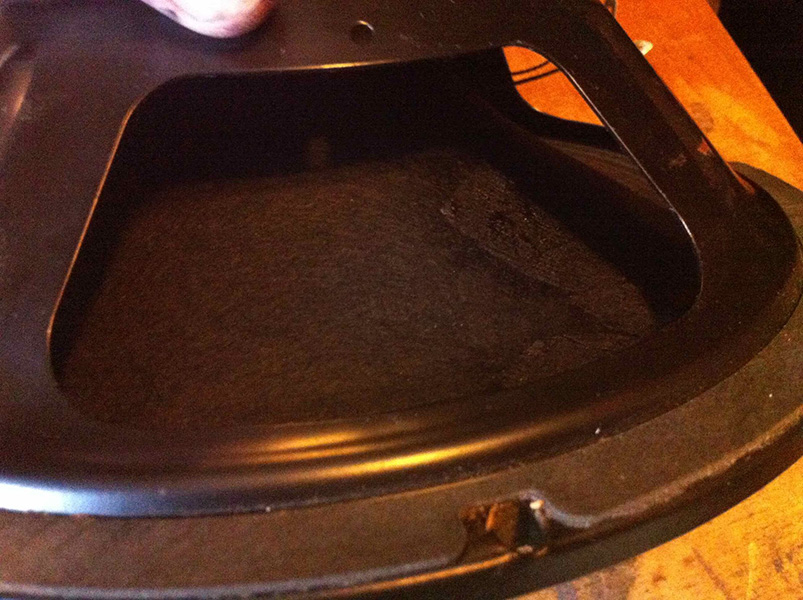
Re-install the speaker and listen to the slightly less awesomeness of what it used to sound like! Still, it’s better than some flappy, crappy cone sound and it’ll get you through the rest of your tour. When you have the time, money, and inclination, replace the whole damn speaker.
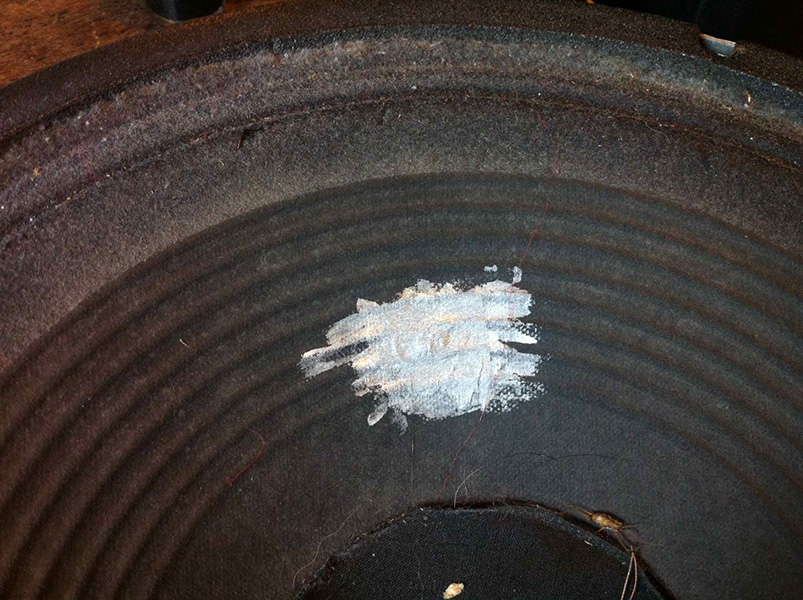
The same golf clubs that ripped this speaker also dented the dust cap on another one. It’s not the most egregious injury to a speaker, but it’s an easy fix and so, presented here.
Poor lil’ guy is smooshed! Potentially, this does affect the sound as the dust cap will vibrate in an ugly way once it’s been wrinkled up. With no way to push the cap back into shape, the only choice is to pull it.
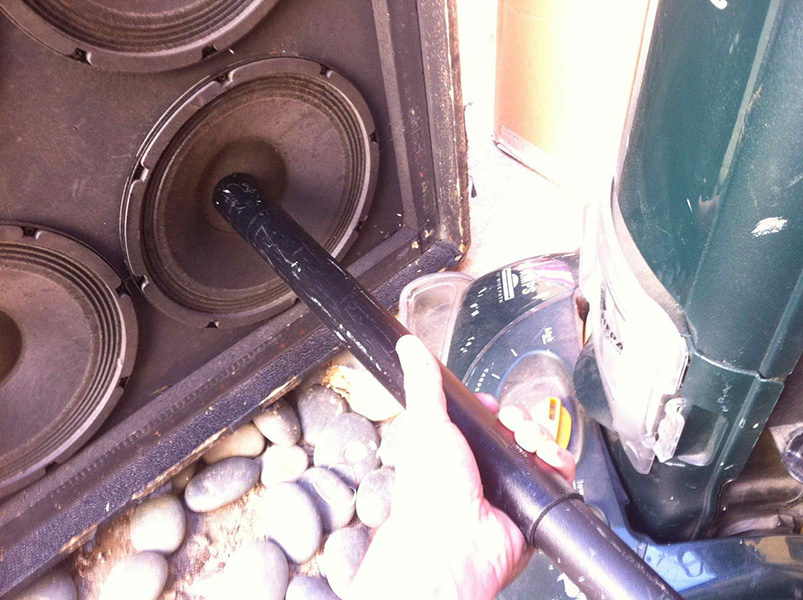
It might be hard to tell in that picture, but that is a vacuum cleaner. Why do they make those things look all space-agey these days anyway? As if it cleans better because it looks like something out of Logan’s Run.

BAM! This dust cap is back in perfect shape. Sometimes they end up a tad warped and there’s nothing you can do about it. For that, the best recommendation is to not store cabinets with the speakers out and with no grill protecting them because you’re a dummy like me.
Or don't have roommates that play golf…
One of my speakers got a tear in it. I didn’t know that you could use nail polish and paper towels for a temporary fix! I’ll do that while I wait for a professional to fix it properly.
man, the comments thing sucks, limits ya like twitter ffs
use rolling paper and elmers white glue (watered down) or rubber cement, not nail polish. works better. trust.
Sounds like another valid repair method. I’ll try it next time it comes up.